All Posts By

Kanrawee Sae Hong

How to use AppsFlyer’s Smart Script for seamless web-to-app tracking

By AnalyticsNo Comments

AppsFlyer’s Smart Script helps to track the user journey from your website to download your app. 

It is quite common to run Google Search Ads campaigns (also called, Search Engine Marketing, or SEM for short) for your apps, but using deep links as the final URL can often result in a violation of SEM advertising policies. A common solution for this is to use a website as a gateway for users, guiding them towards downloading the app through clear call-to-action (CTA) buttons when accessing the website via a mobile device. AppsFlyers makes tracking easier for you to track and guide your user, increasing the number of downloads for your app.

In this article, we will provide our use case and implementation of this powerful tool. We’ll also share tips on how to properly check your implementation to ensure accuracy of implementation.

Stay tuned! We will also use ChatGPT as a tool during the implementation of this guide 🙂

Who is this guide for?

A decent amount of experience is needed! If you already have background knowledge of OneLink and app tracking, that will help. Coding experience is not required but you will have to be comfortable with copy-pasting and adjusting code.

In what circumstances does this guide apply?

  1. You are using AppsFlyer.
  2. You are having a website that guides users to your app.
  3. You are using UTM or custom parameter tracking for your campaigns.

What exactly is AppsFlyer’s Smart Script?

AppsFlyer’s Smart Script is a script that you place on your website which will allow you to capture various parameter types from different media sources. When your users land on the website from different sources and via different URLs, the script will dynamically create links including deep links that optimize and personalize web-to-app experiences.

In other words, it helps reduce the blind spot of your organic installs from your web campaign by implementing AppsFlyer’s Smart Script which prompts users to download your app when they visit your website.

What’s the point of having AppsFlyer’s Smart Script tracking when we already have Deep Link/OneLink with proper in-app event tracking?

Let’s say you’re setting the OneLink template to direct users to the specific content within your app, or to the App Store or Play Store if they haven’t installed the app yet. You then add this OneLink URL to the CTA buttons on your website so that when users click the buttons, they behave according to the settings in the OneLink template.

There is a high chance that the traffic source information will be lost when doing this because those parameters will not pass through, and users who install the app will be attributed to AppsFlyer as direct (or “organic”) traffics. Therefore, you will need a bridge to close the gap of users moving between the web and the app. That’s where AppsFlyer’s Smart Script comes into play 🙂

The AppsFlyer’s guide! (with example)

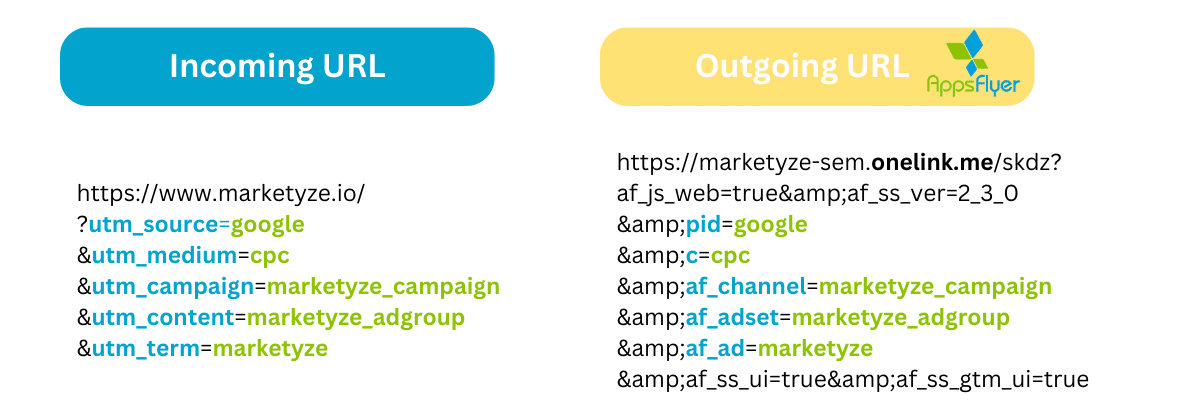
Say we run SEM campaigns to promote an app, but first, we lead users to our company website (marketyze.io) which contains CTA buttons with a prompt to download. In the same campaign, we would also like to track performance, so we use UTM tracking parameters Example of the URL with UTM tracking:

URL with UTM tracking example from Marketyze.This kind of URL will be called an “Incoming URL.”

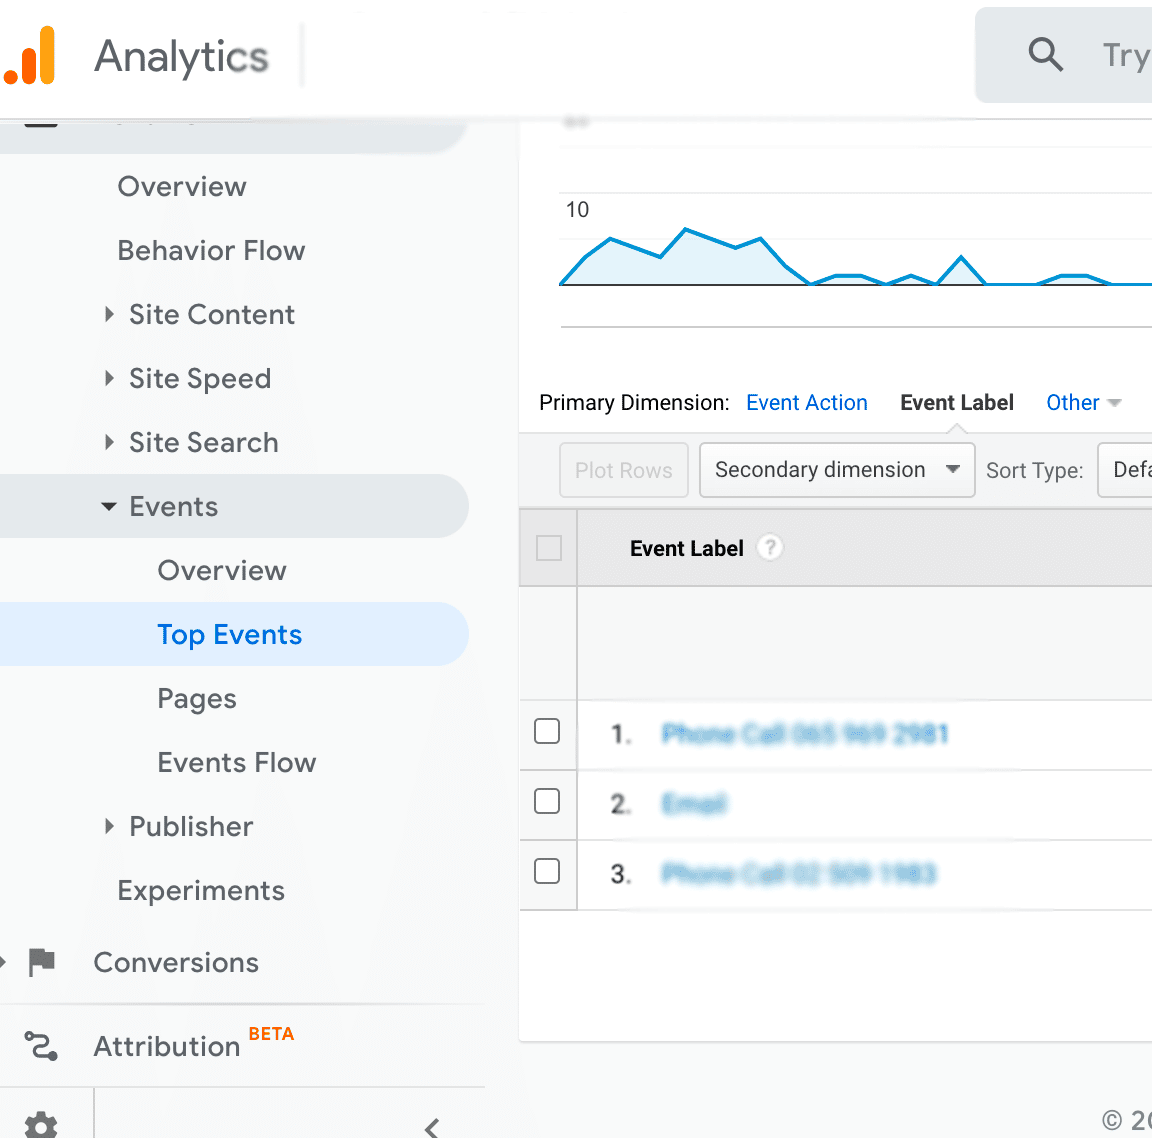
Again, let’s say we would like to see how many people installed this app and took other in-app actions in AppsFlyer’s report after clicking on my SEM campaigns. We need to complete the tracking journey by following these 2 steps:

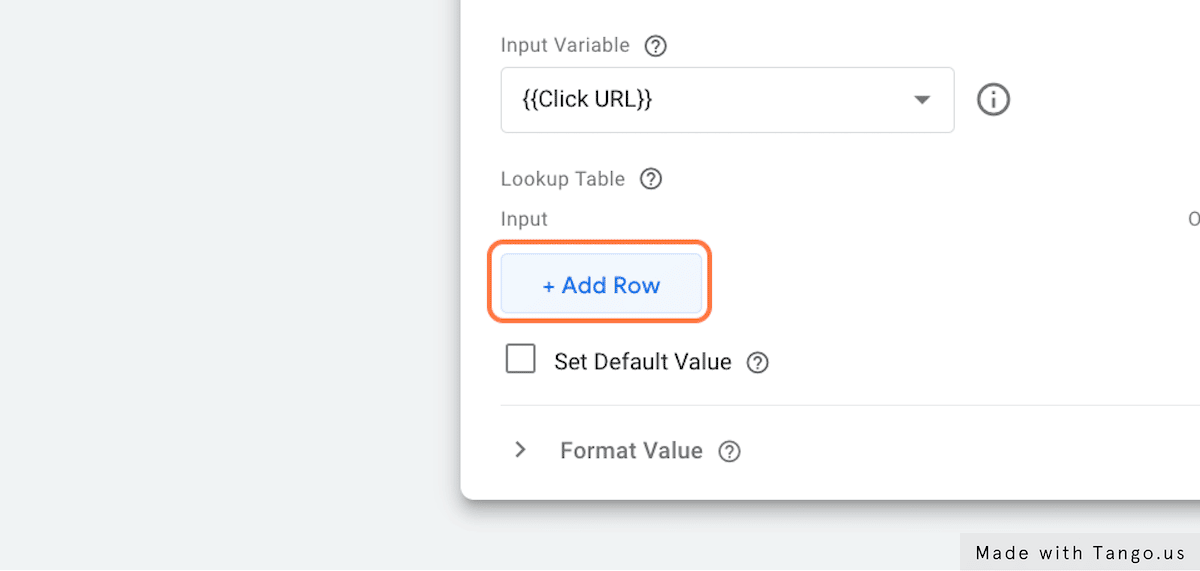
1. Generate Smart Script from AppsFlyer’s interface

a. Select OneLink Template for your AppsFlyer’s Smart Script

OneLink Template from AppsFlyer.

b. Map your URL’s parameters

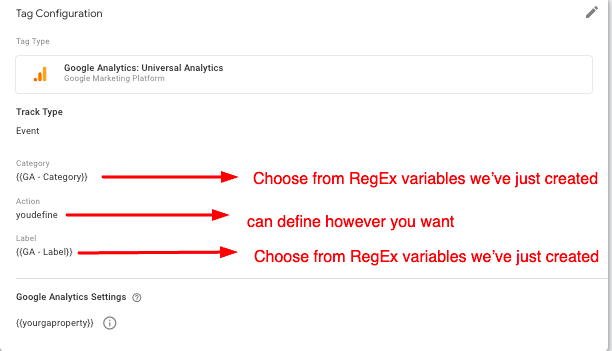
From the example URL, I have utm_source, utm_medium, utm_campaign, utm_content, and utm_term. I will need to map these with fields that Appsflyer provides. You can see the example of how we map in the screenshot below:

URL parameter mapping on AppsFlyer.
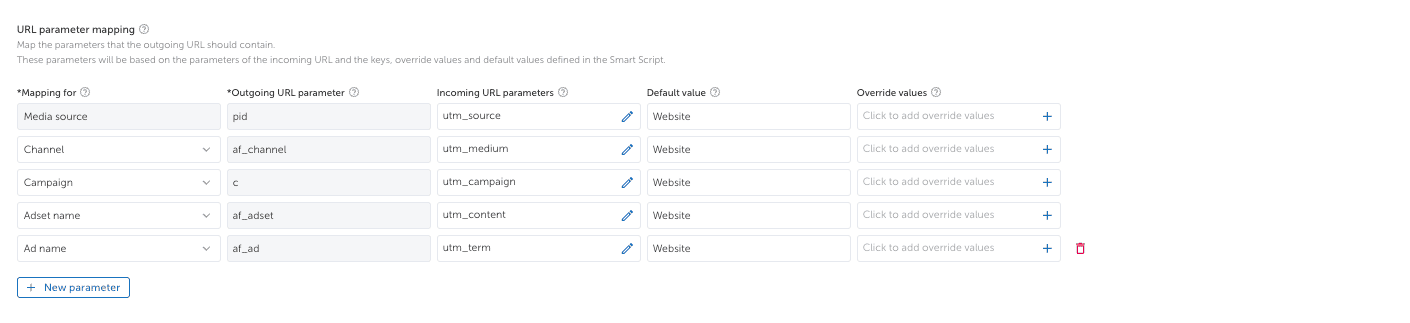
For the default value, which is the value you want to be shown on your dashboard, you can define whatever you’d like to see when the parameters can’t be mapped. For example, the URL is missing utm_source, under Media Source in the report, this will show as Website.

For the override values, the value from the incoming URL can be replaced with the value you specify in this field. For example, if the value in the incoming URL is Google, the value in the outgoing URL can be changed to paid ads.

c. Generate and embed the AppsFlyer’s Smart script on your website

Once you add all the necessary parameters, there are two options to implement. First directly embed this AppsFlyer’s Smart Script in your website with a web developer or you can use Google Tag Manager (GTM). In this case, our recommendation is to use GTM.

When you click generate, you will be able to copy the AppsFlyer’s smart script:

Generate and copy the script on AppsFlyer.
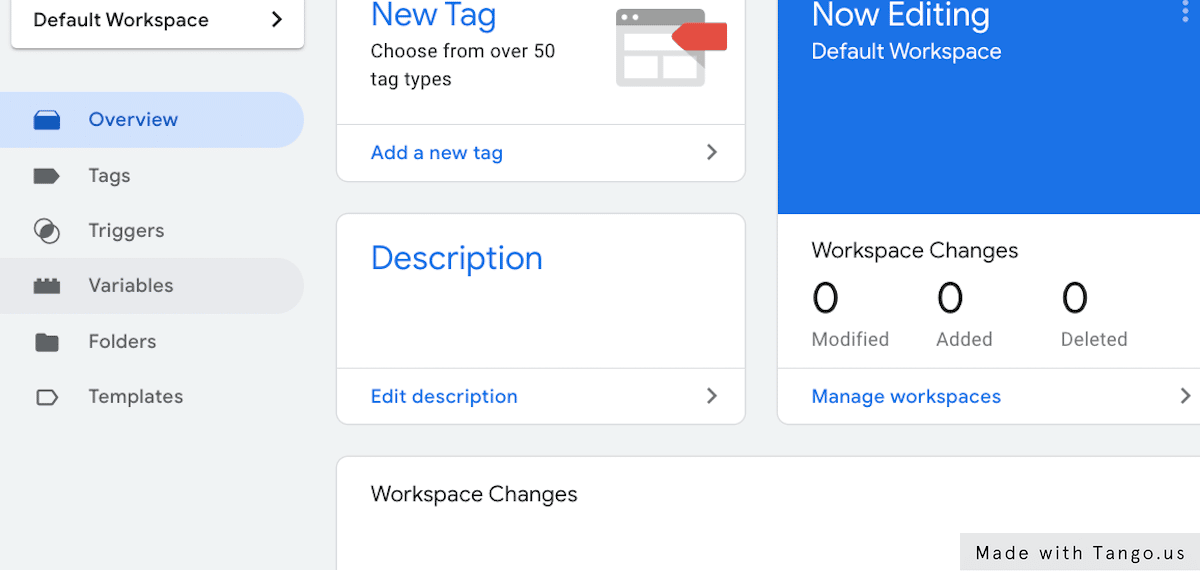
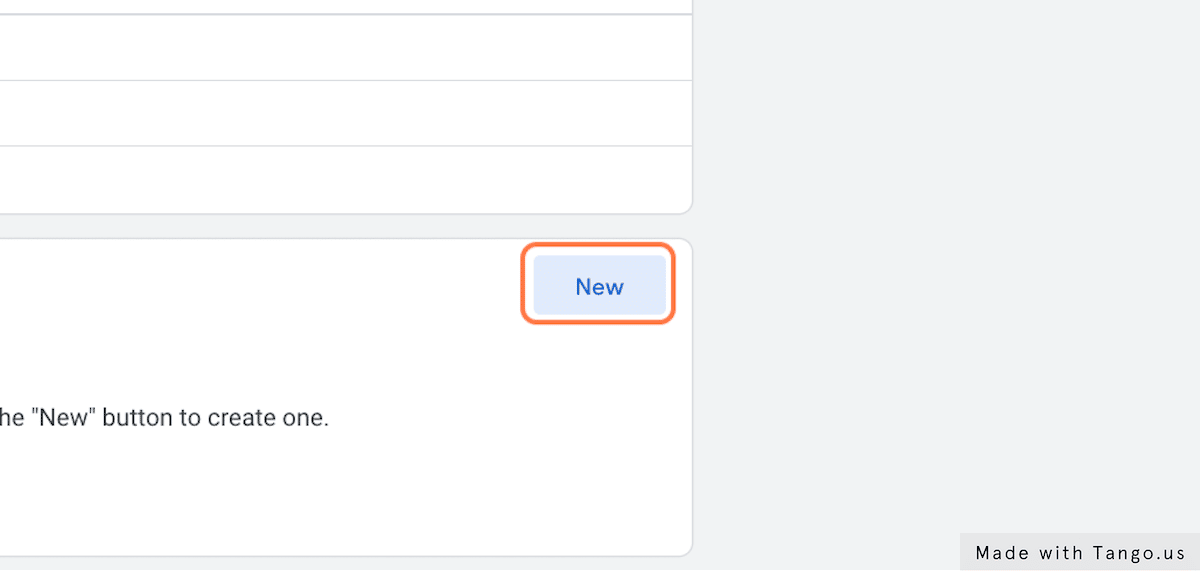
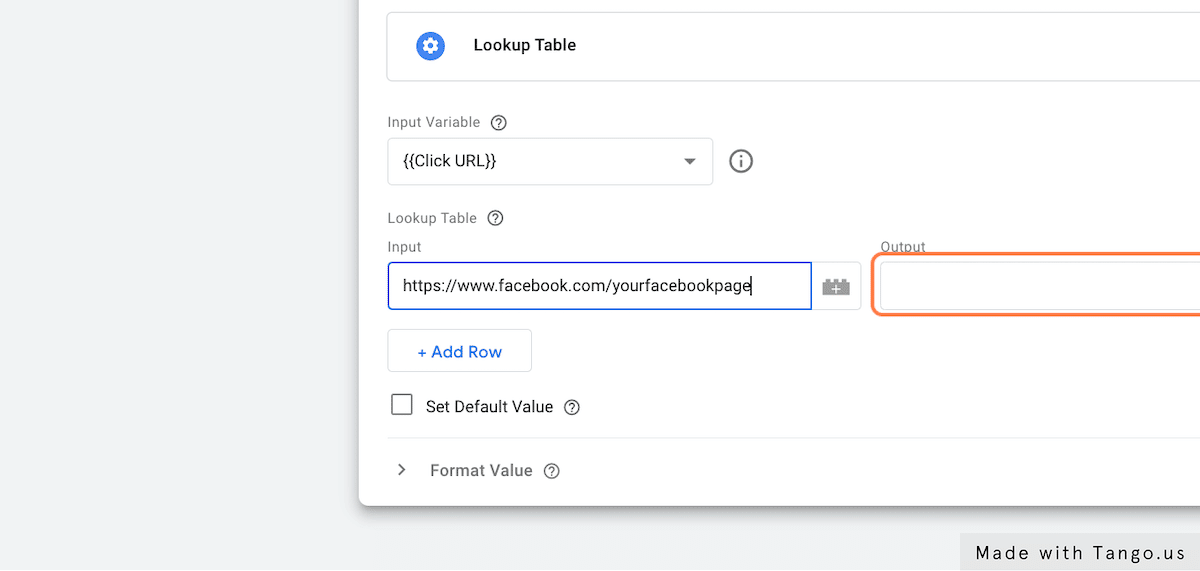
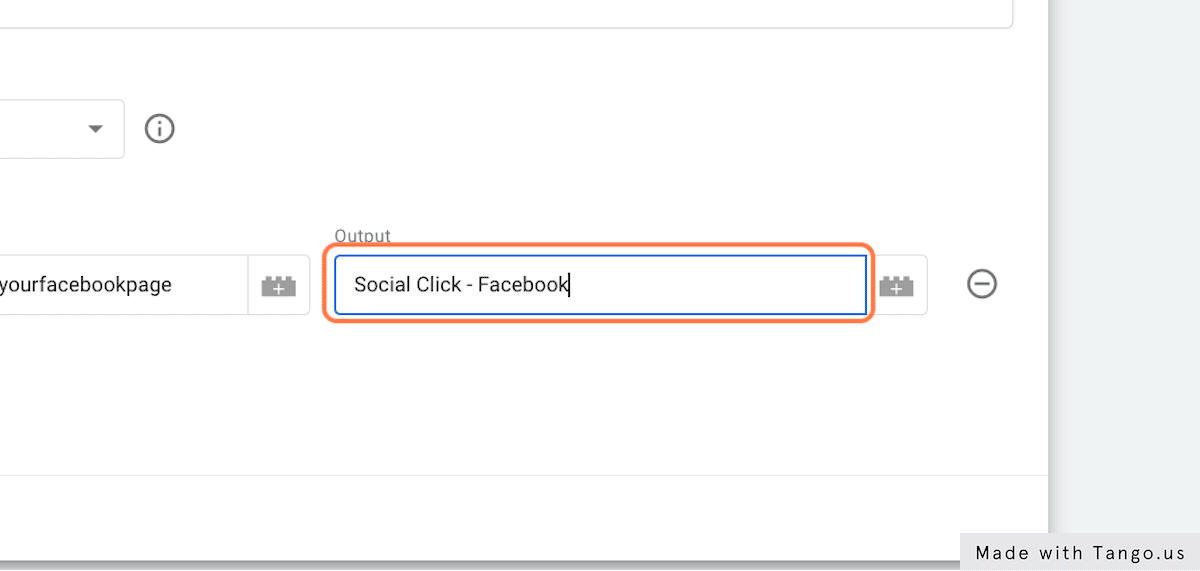
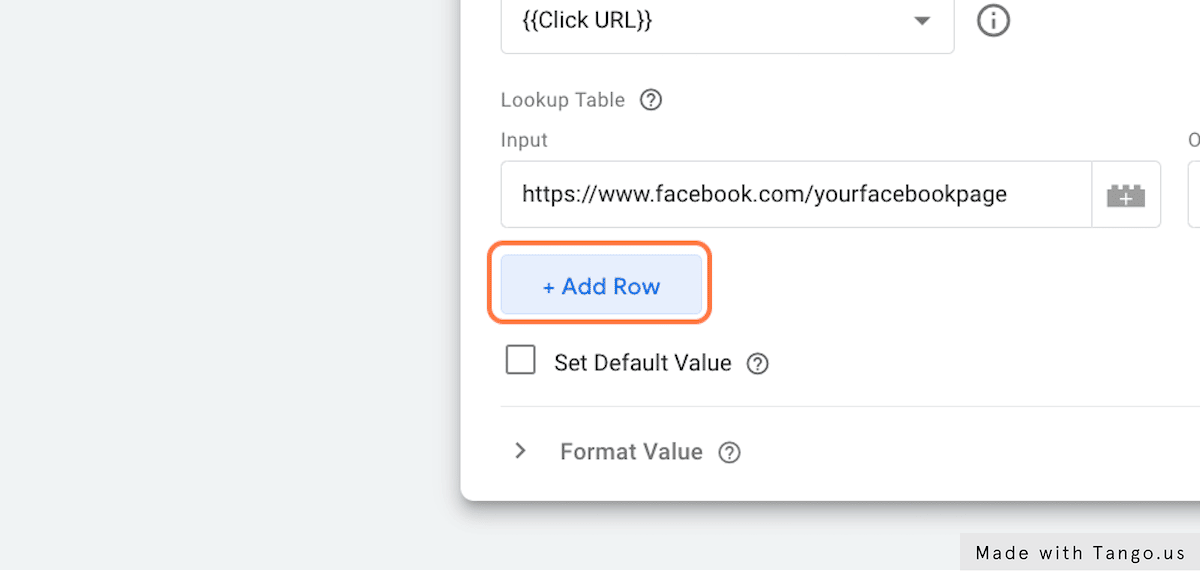
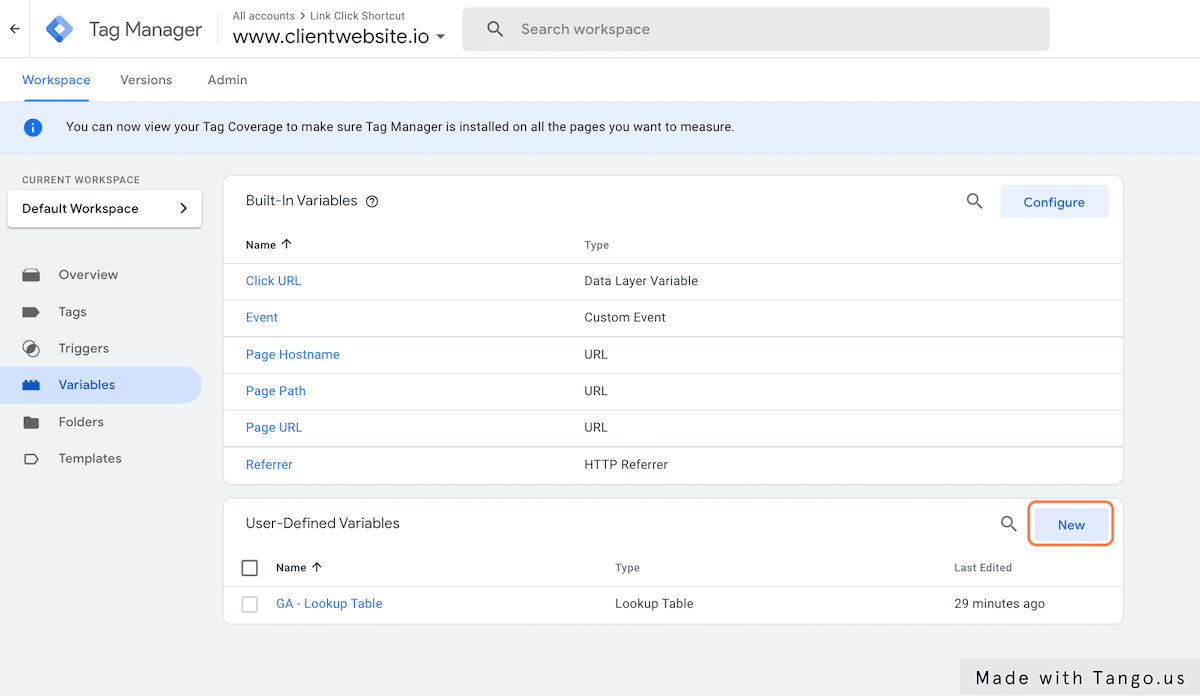
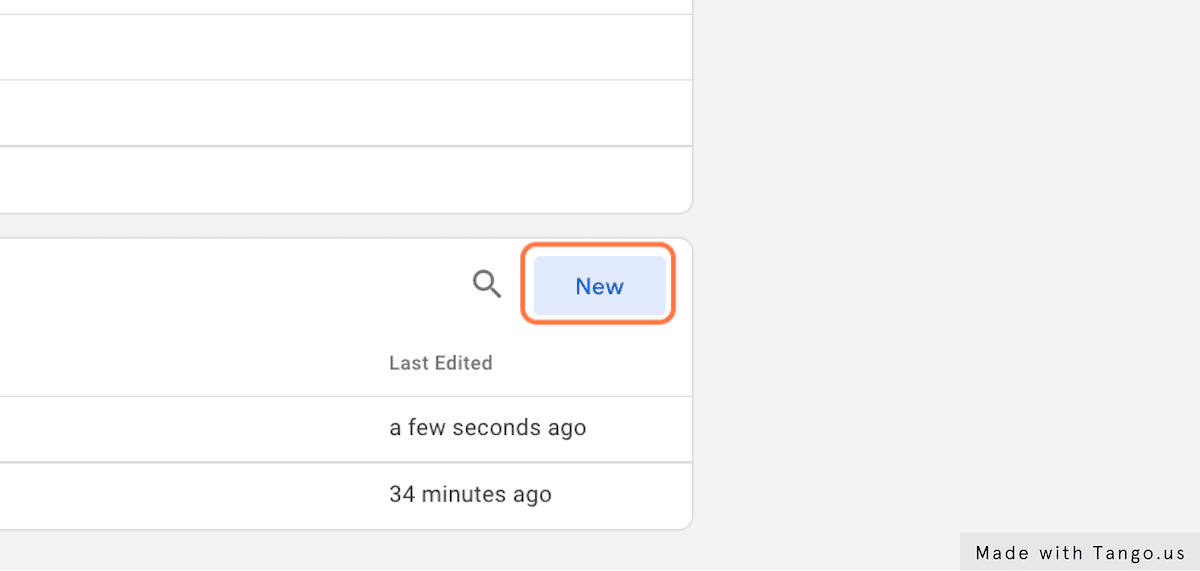
2. Create a tag in Google Tag Manager (GTM)

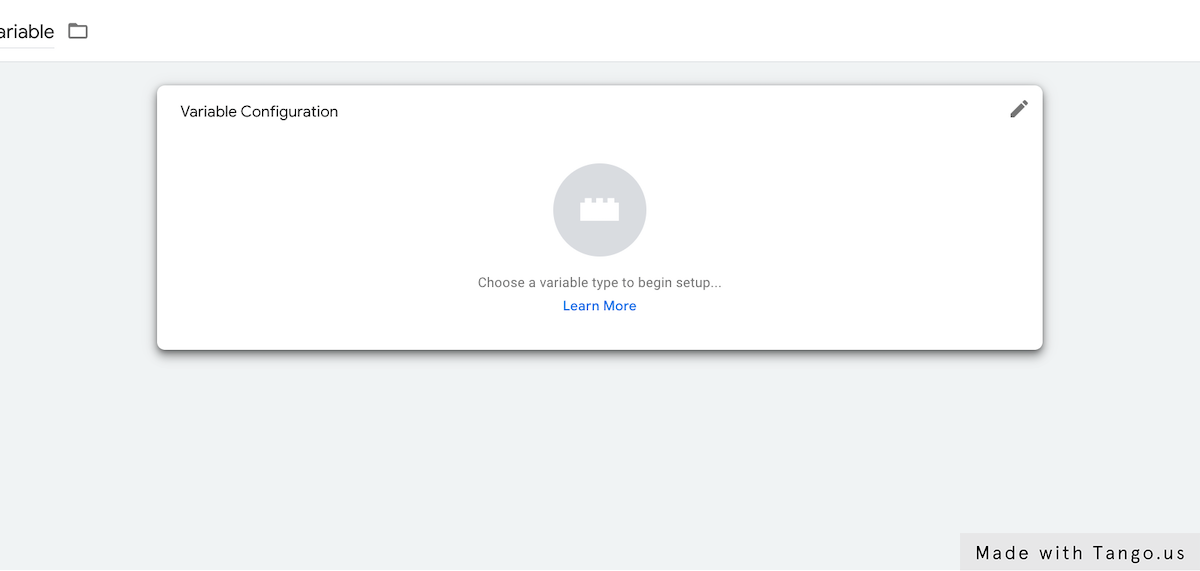
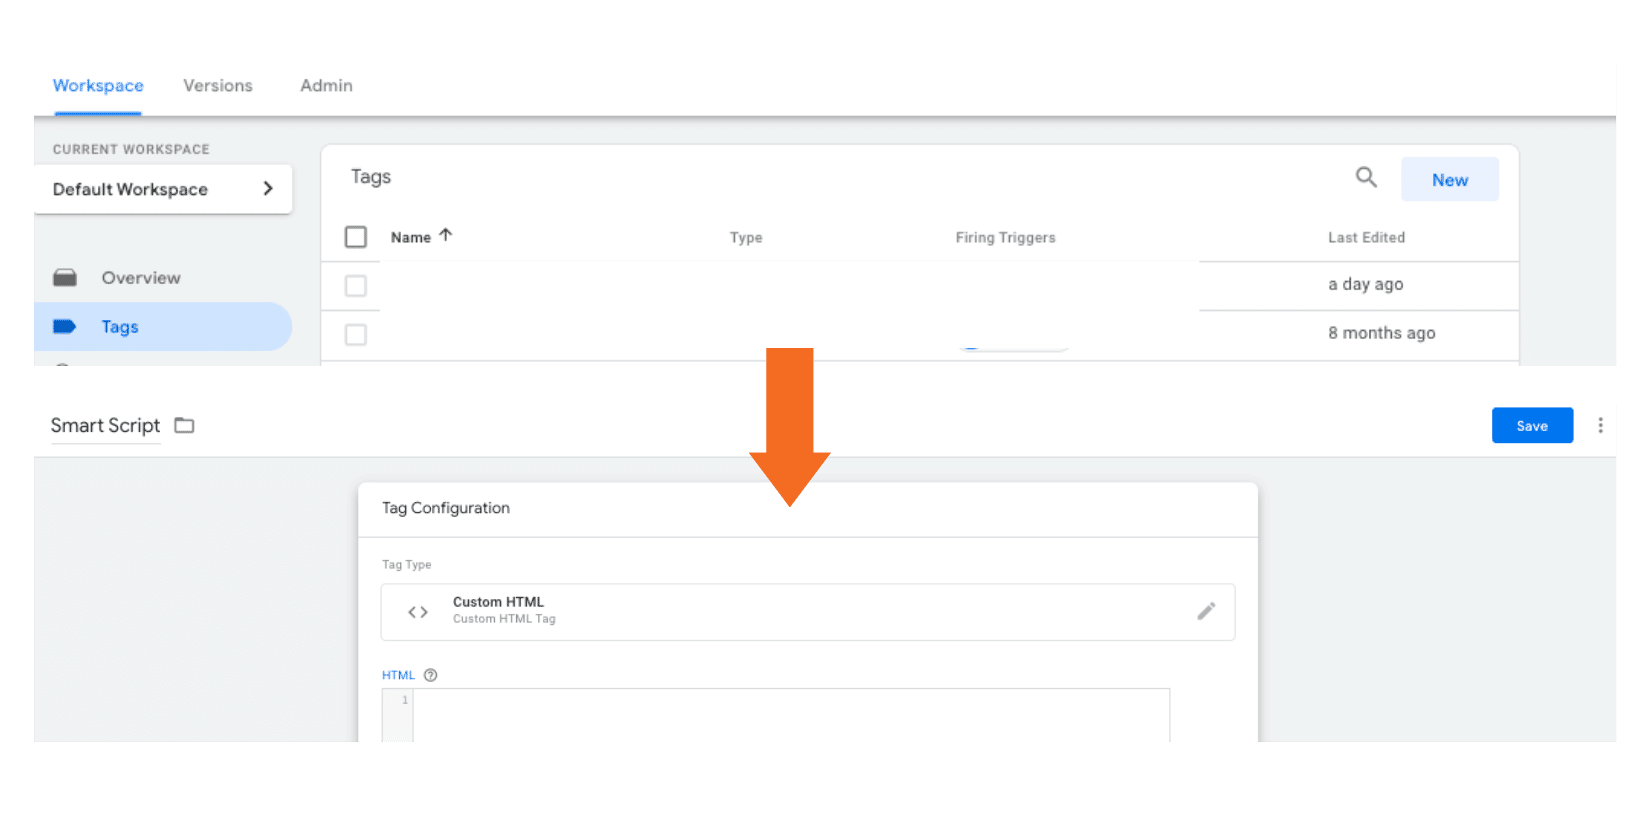
a. Create a new tag, name the tag, click Tag Configuration, and select Custom HTML.

Create a new tag, name the tag, click Tag Configuration, and select Custom HTML on Google Tag Manager.
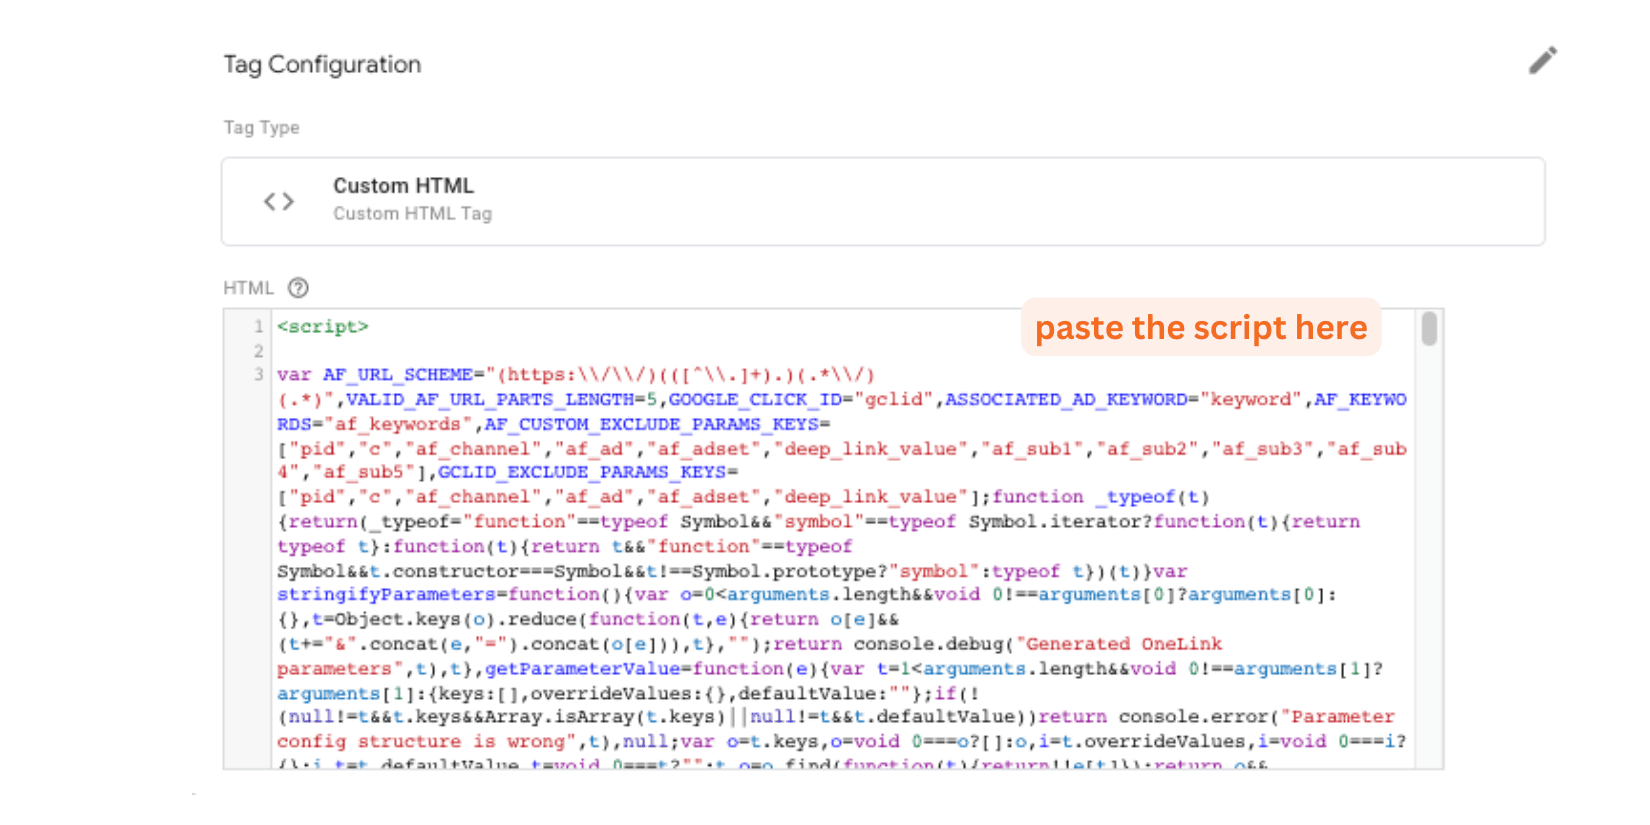
b. In the HTML box, paste the generated AppsFlyer’s Smart Script code.

In the HTML box of Google Tag Manager, paste the script from AppsFlyer.
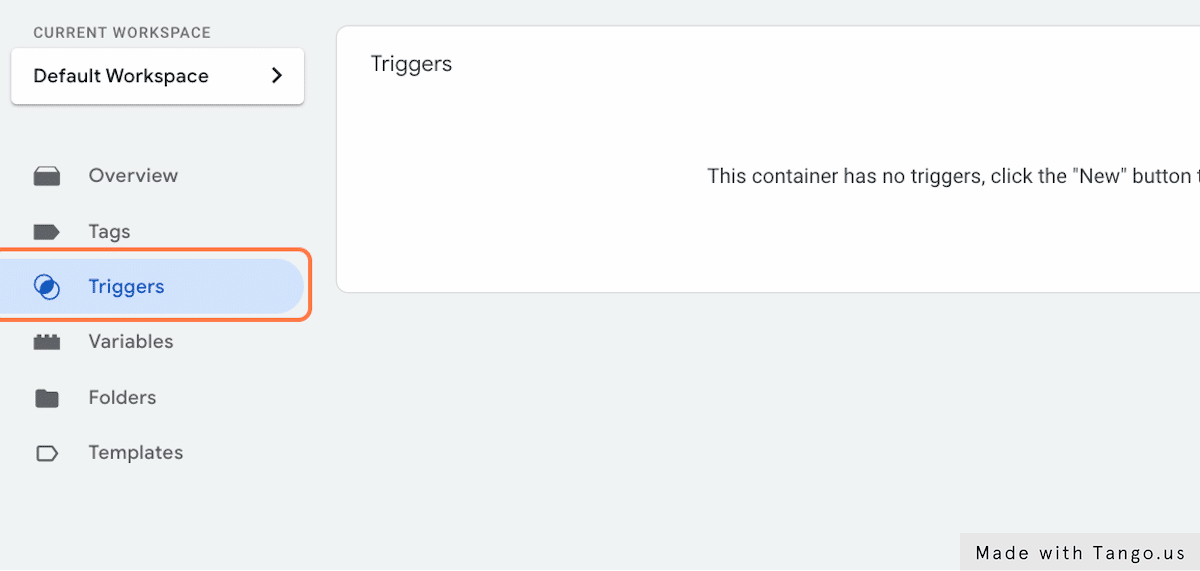
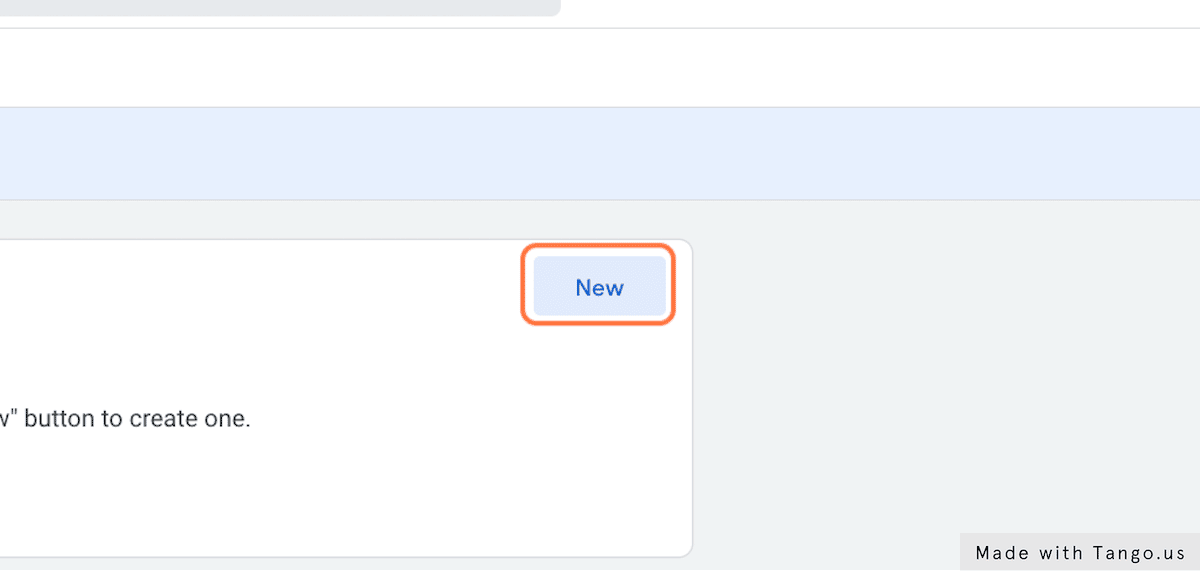
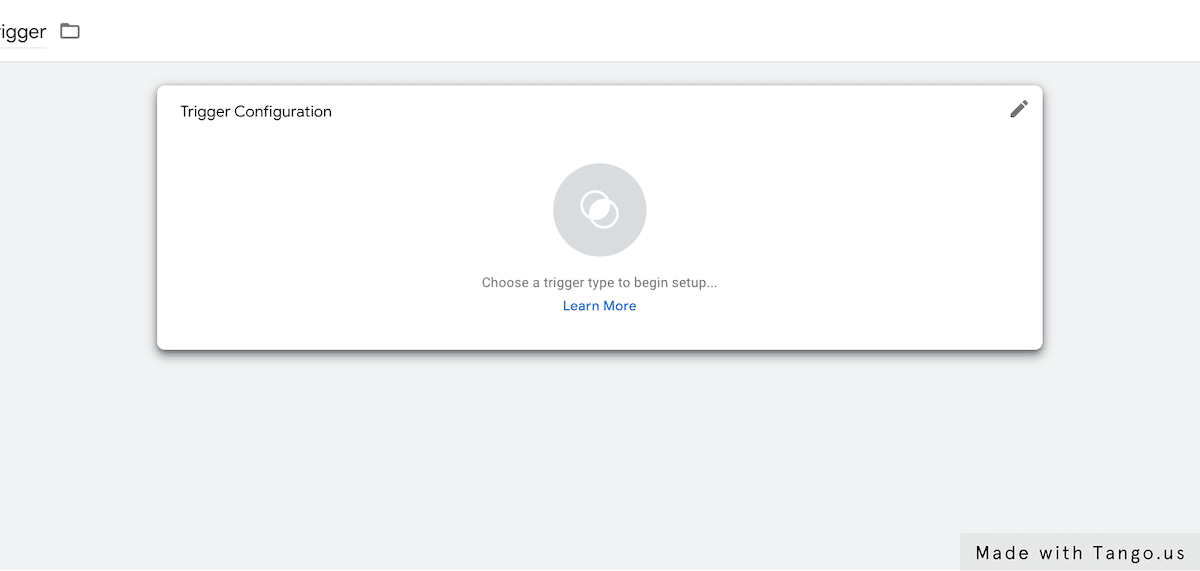
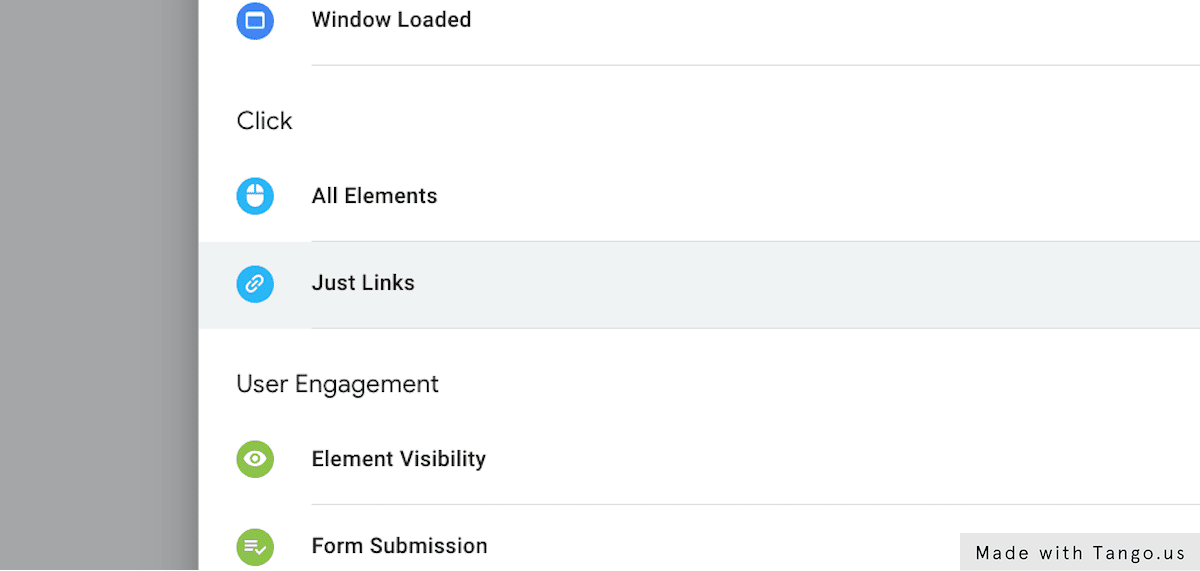
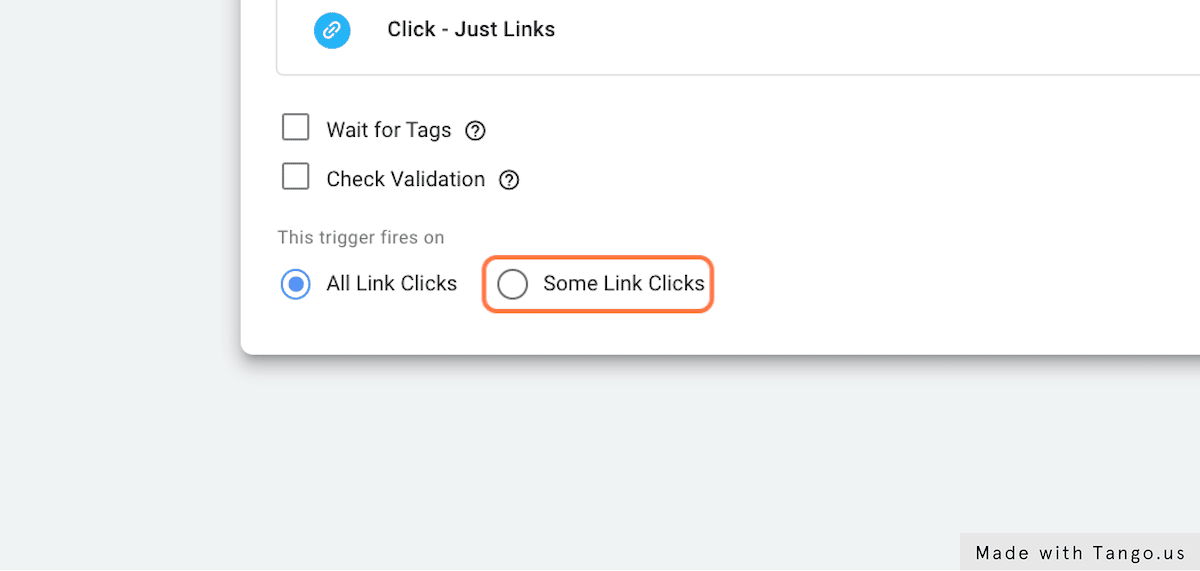
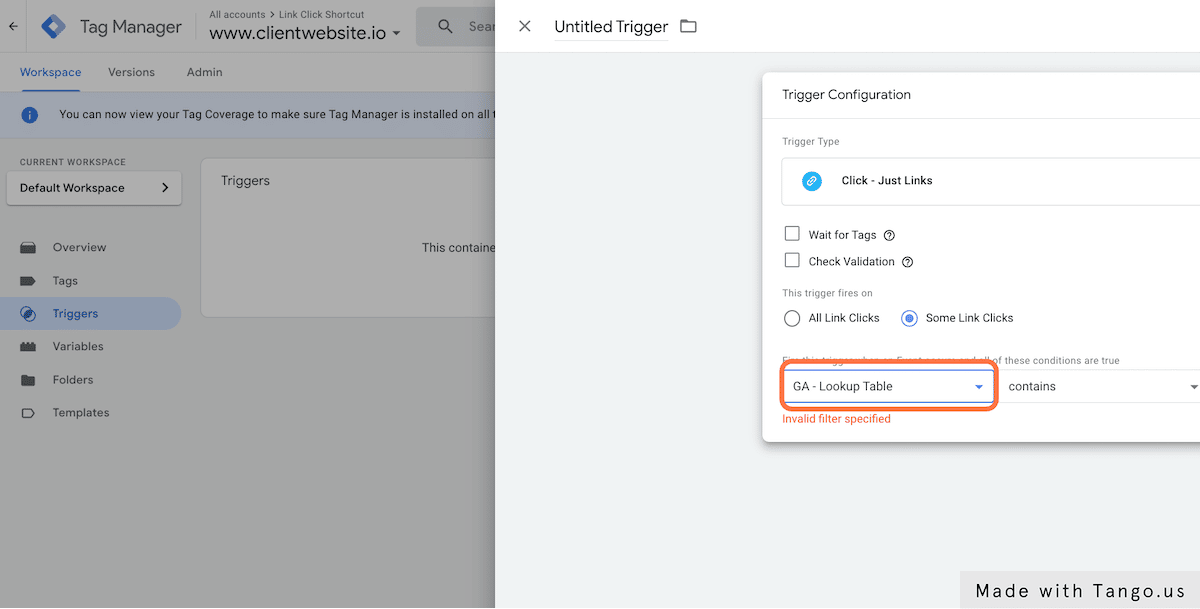
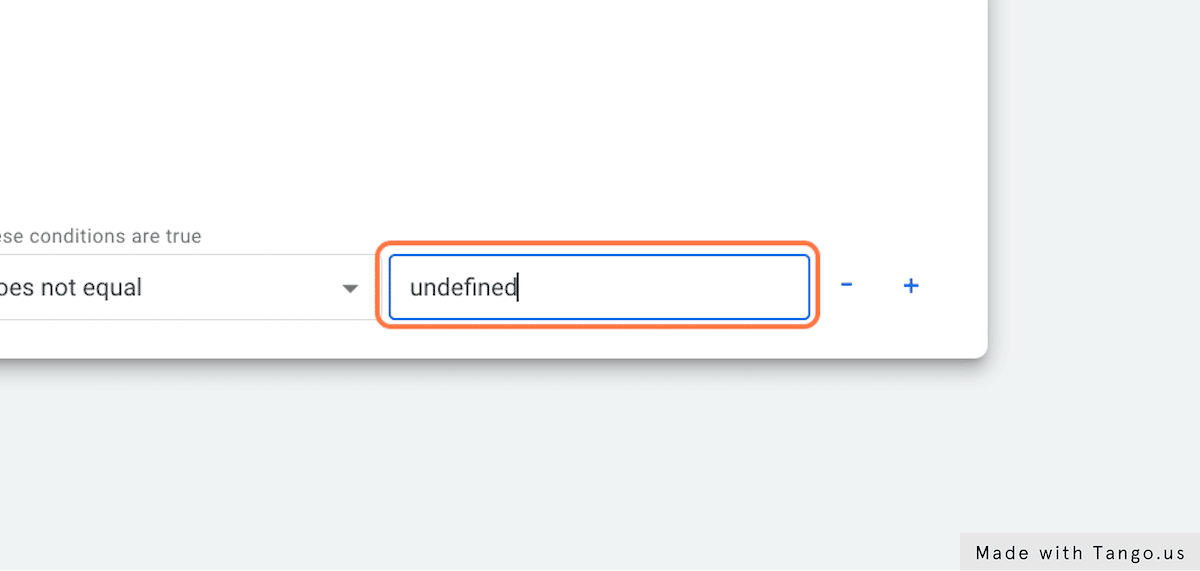
c. Click ‘Triggering’, create a new trigger, name it, and choose “All Pages” Trigger Configuration.
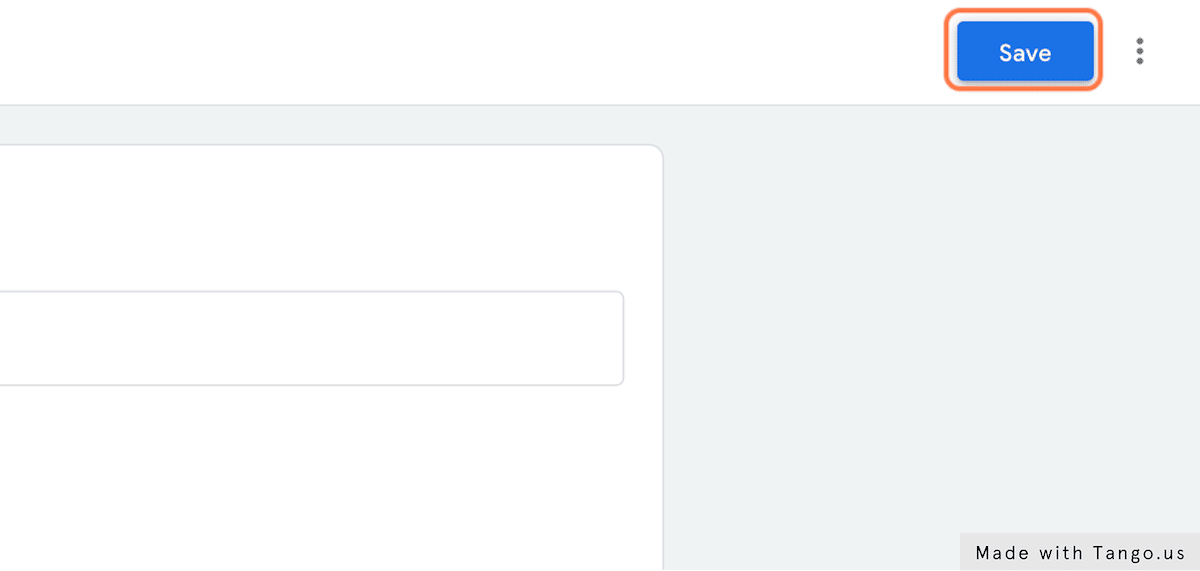
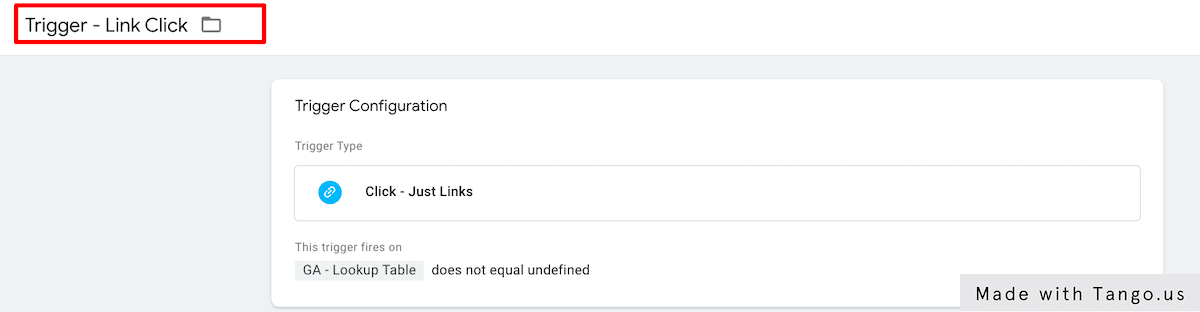
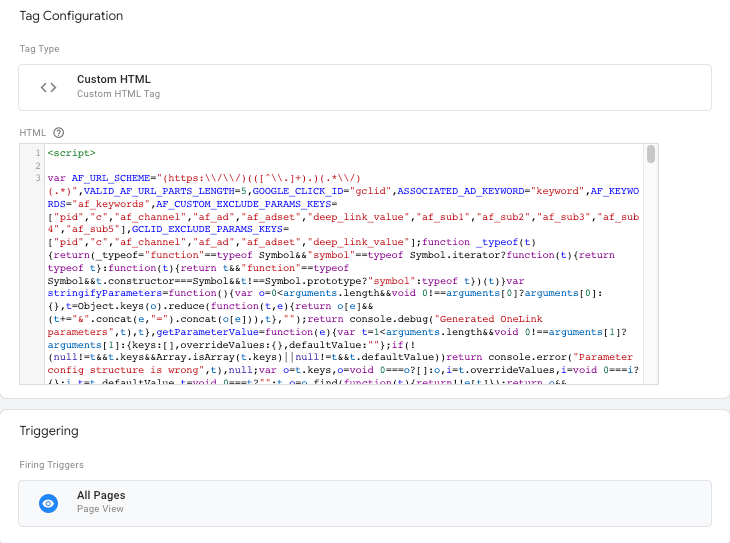
Click ‘Triggering’, create a new trigger, name it, and choose “All Pages” Trigger Configuration on Google Tag Manager.d. Click Save.

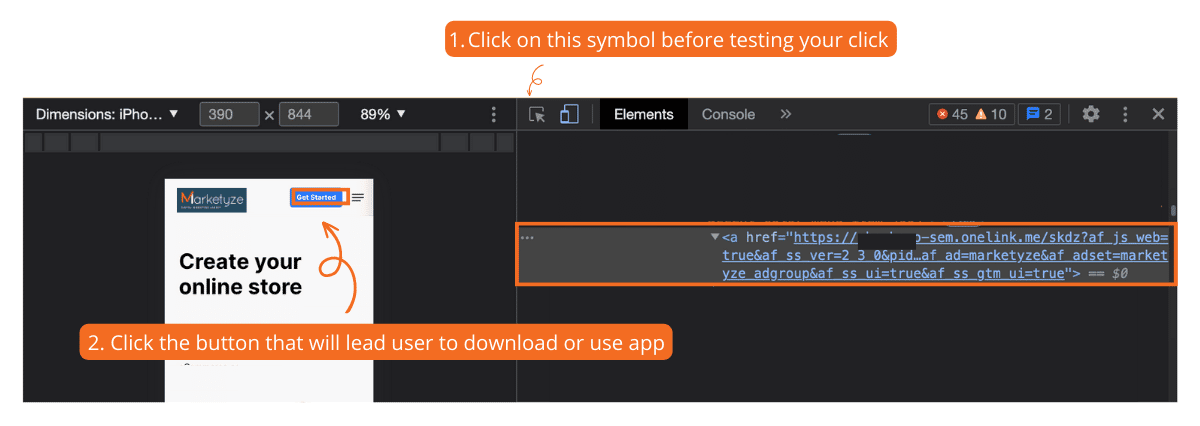
Lastly, you will need to check the outgoing URL for your button clicks as well

To ensure that AppsFlyer’s Smart Script is working as intended and that the value in AF_SMART_SCRIPT_RESULT returns accurately, check the outgoing URL. When you generated the Smart Script on the AppsFlyer’s interface, you should have specified the right outgoing URL, which should be the same.

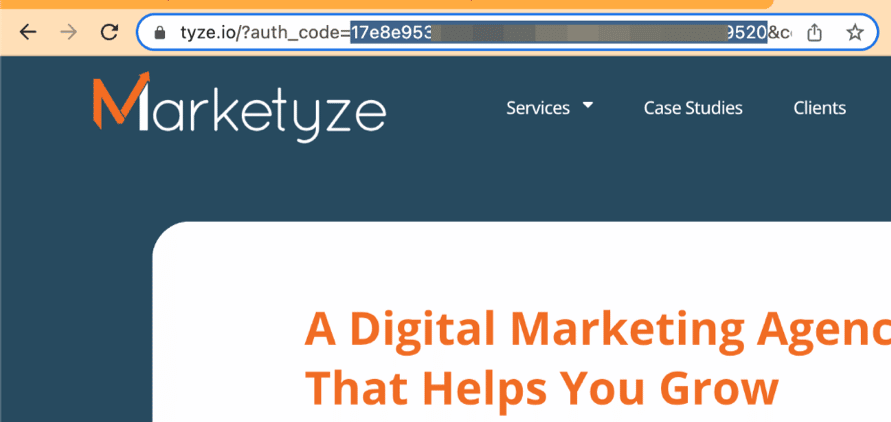
I will again take the example from the earlier URL with UTM, the outgoing URL should be like this:

Check the incoming URL against the outgoing URL generated by AppsFlyer.

To check what the outgoing URL looks like, you’ll need to inspect the clicks and see their href attribute. See the picture below:

Inspect the clicks and see their href attributes.
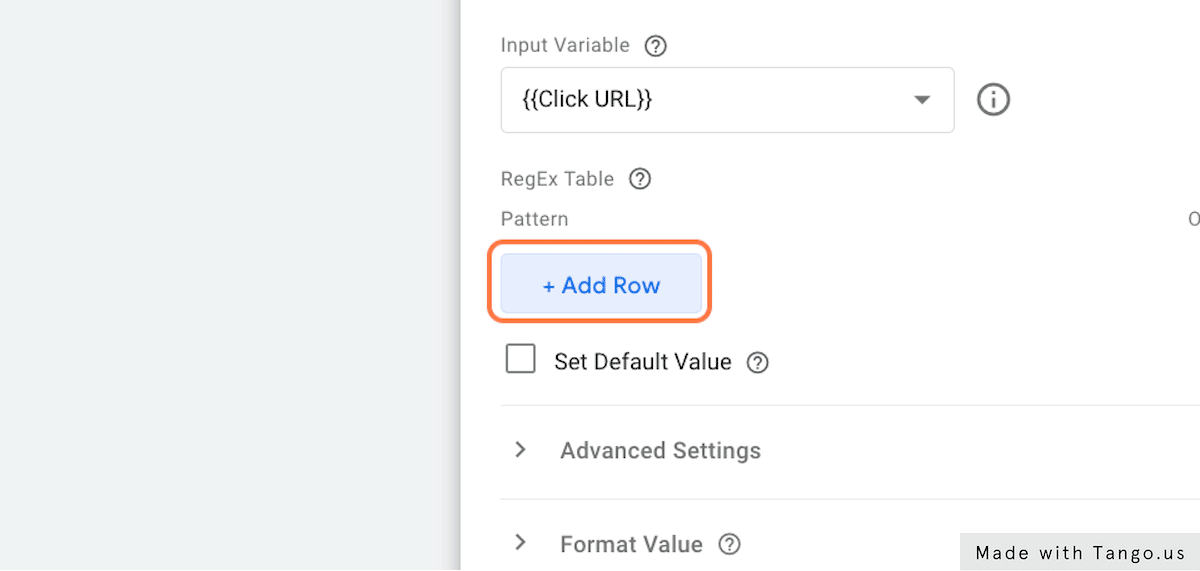
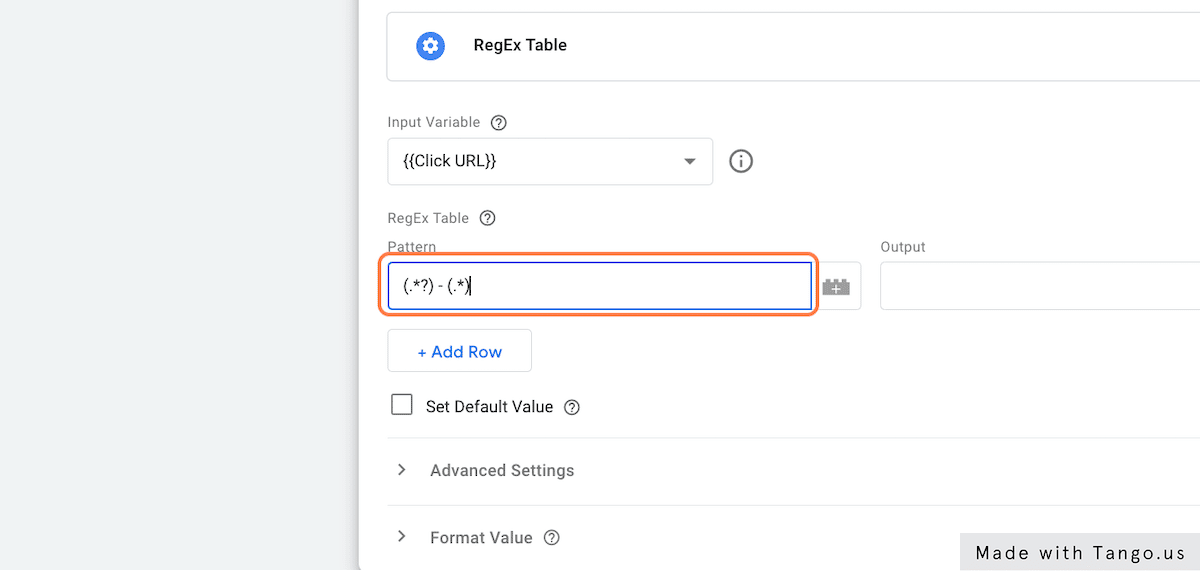
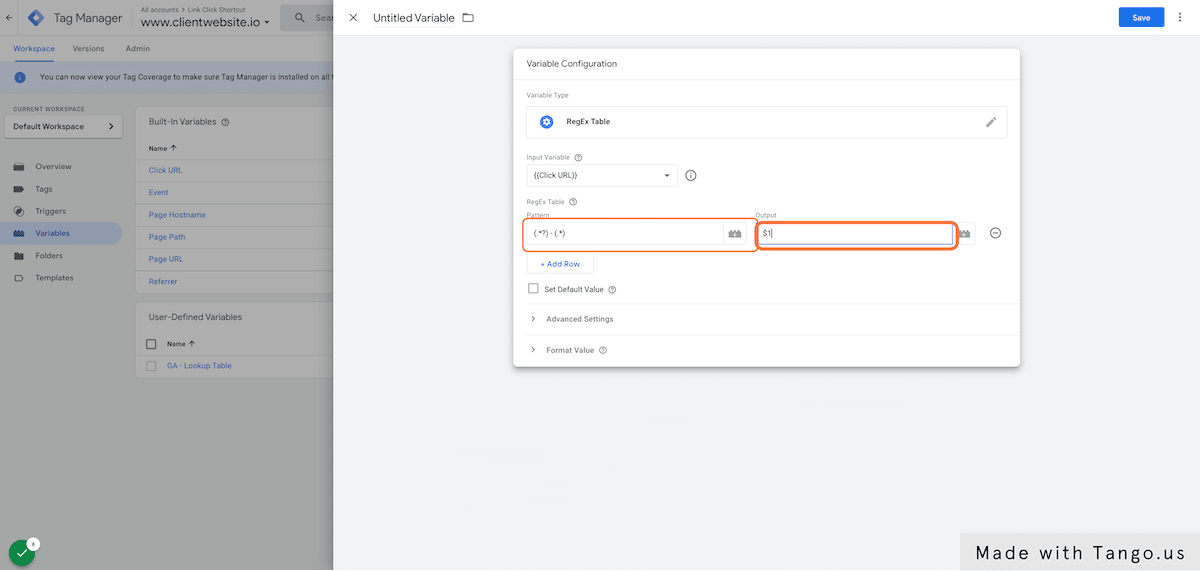
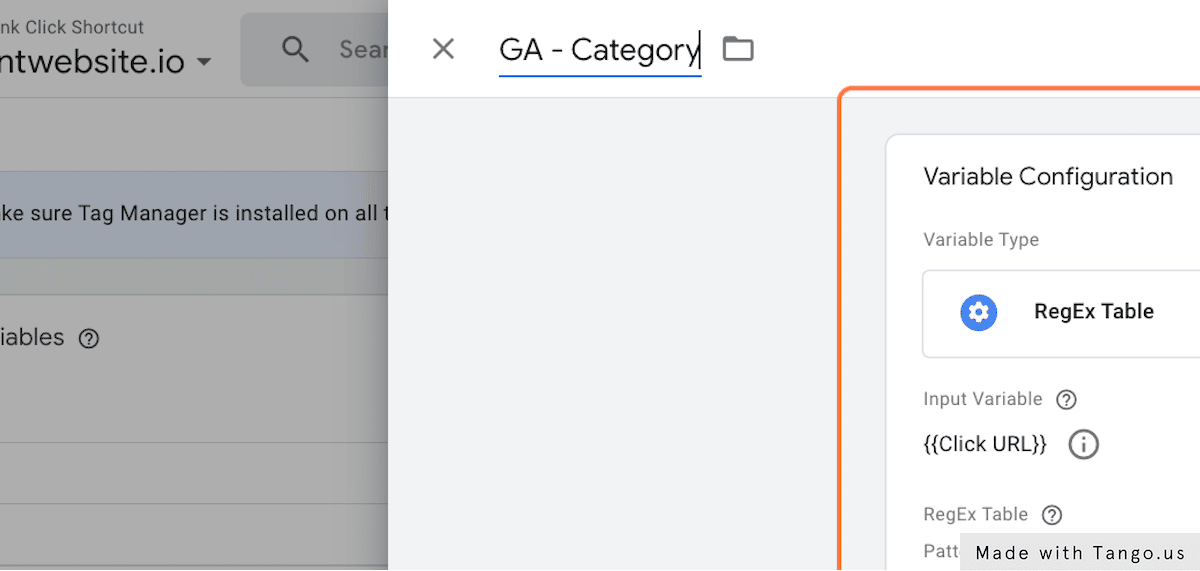
If the AppsFlyer’s Smart Script doesn’t produce a OneLink URL when the button is clicked just as in the example, I’d recommend the other option which is to consult with your web developer. In case this is not an option, you could still use Google Tag Manager by assigning the URL to your button clicks directly.

Here, I will use a bit of help from ChatGPT! See my prompt below 👇🏻

Using ChatGPT to generate a OneLink URL.

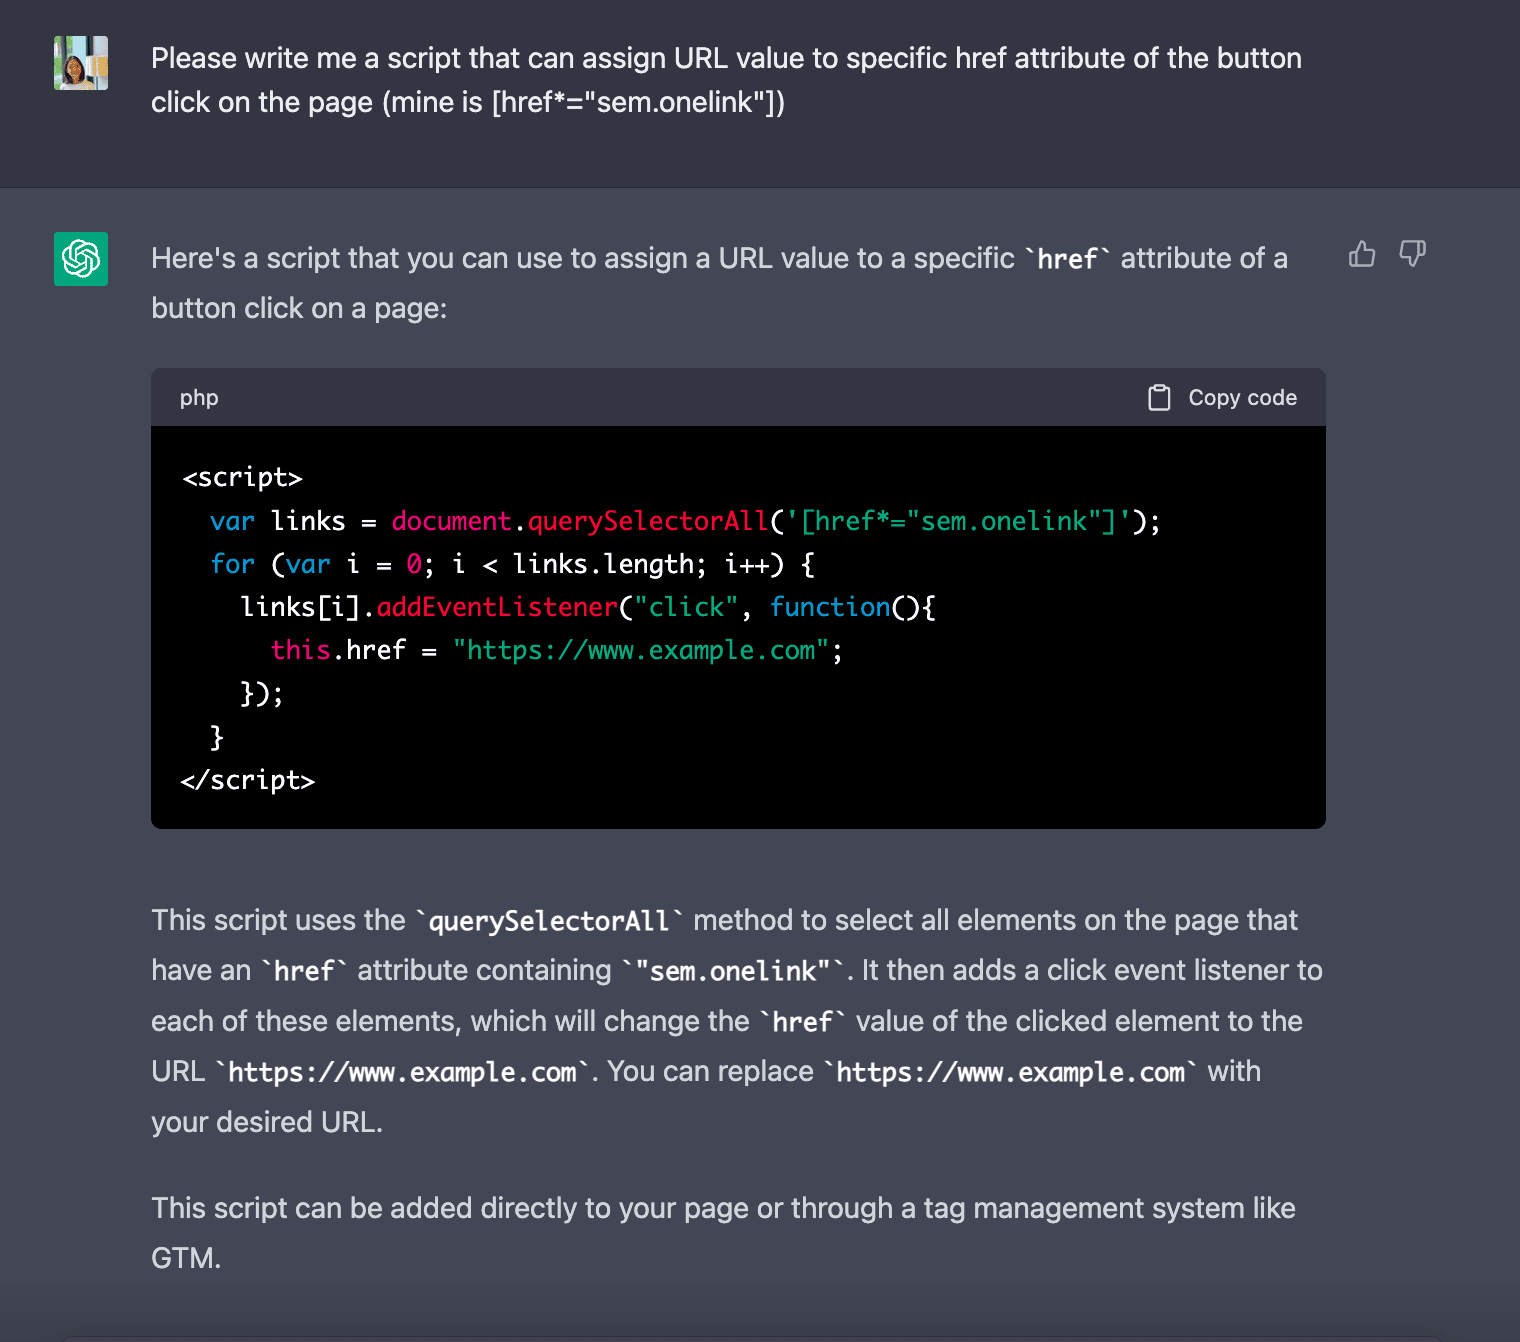
However, we still need some modifications a bit as per what ChatGPT has explained at the end.

Therefore, I have made the following changes:

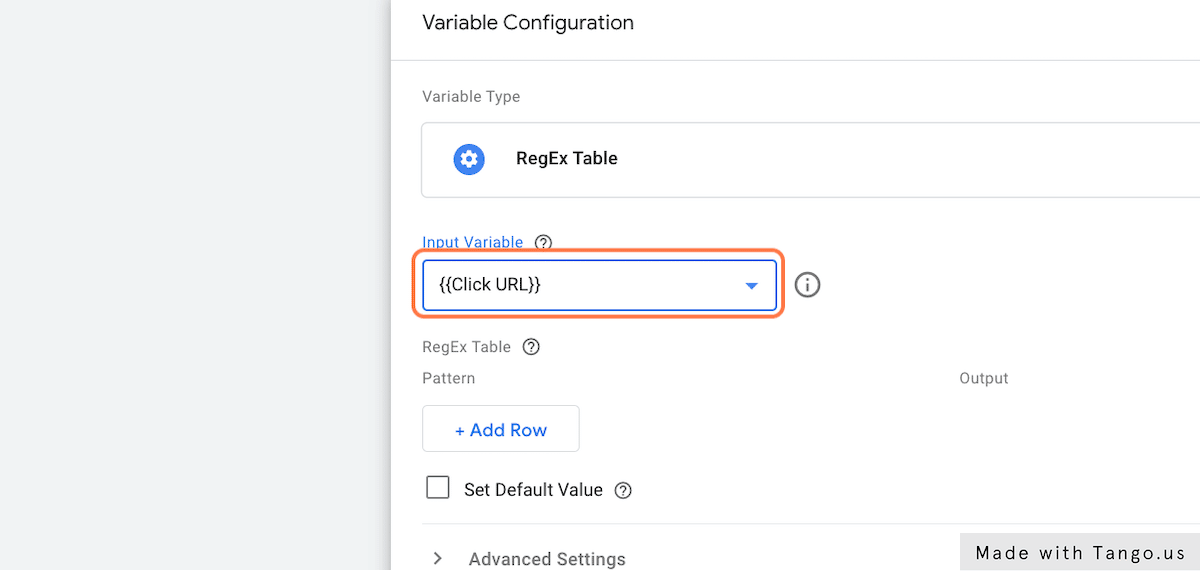
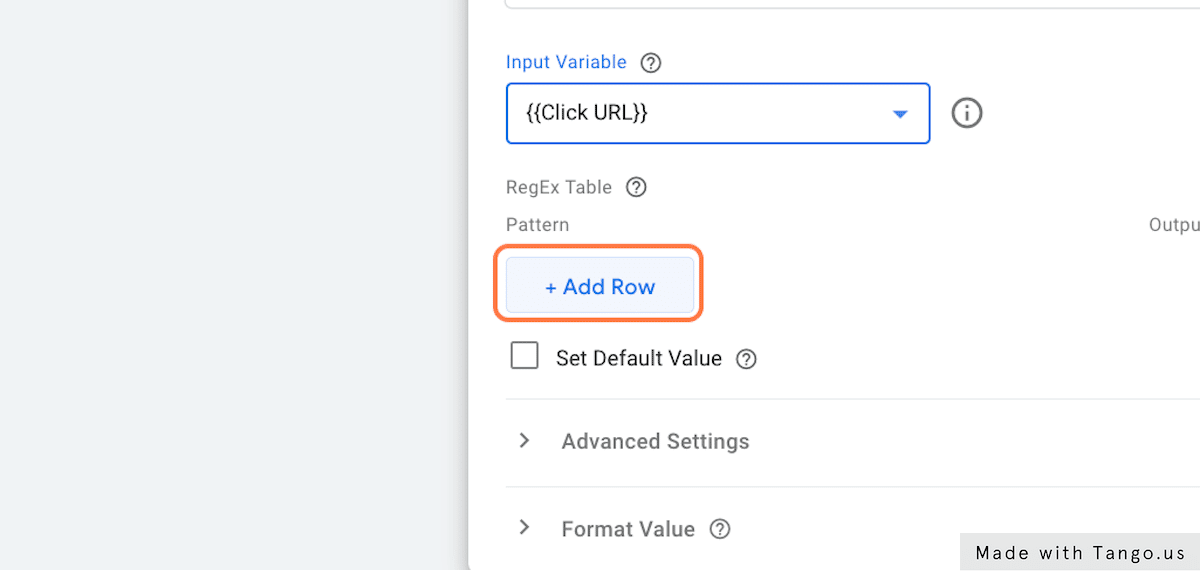
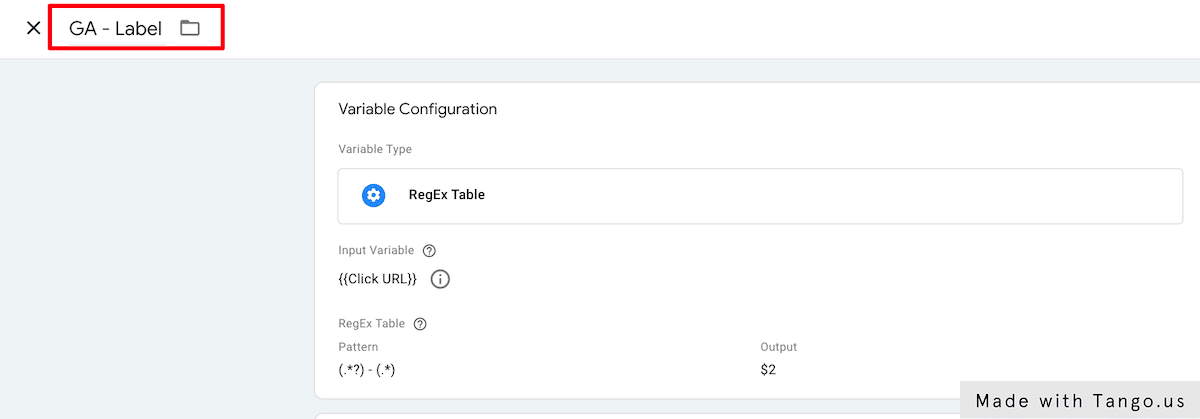
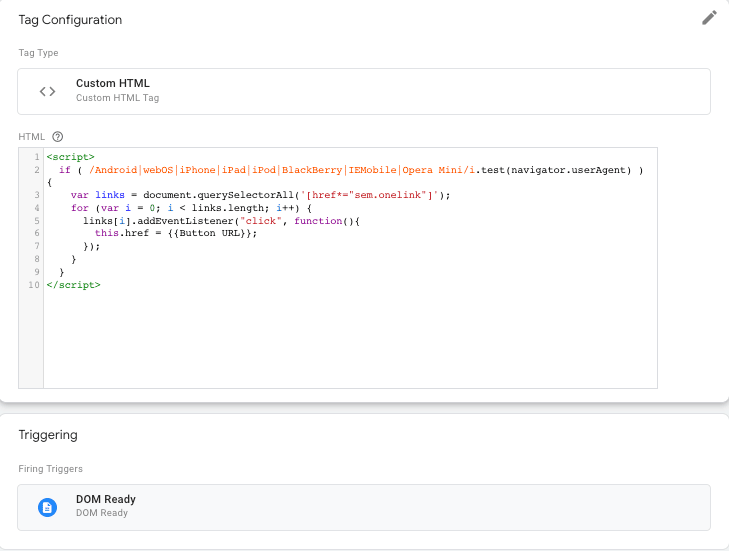
1. I changed from https://www.example.com to be {{Button URL}}

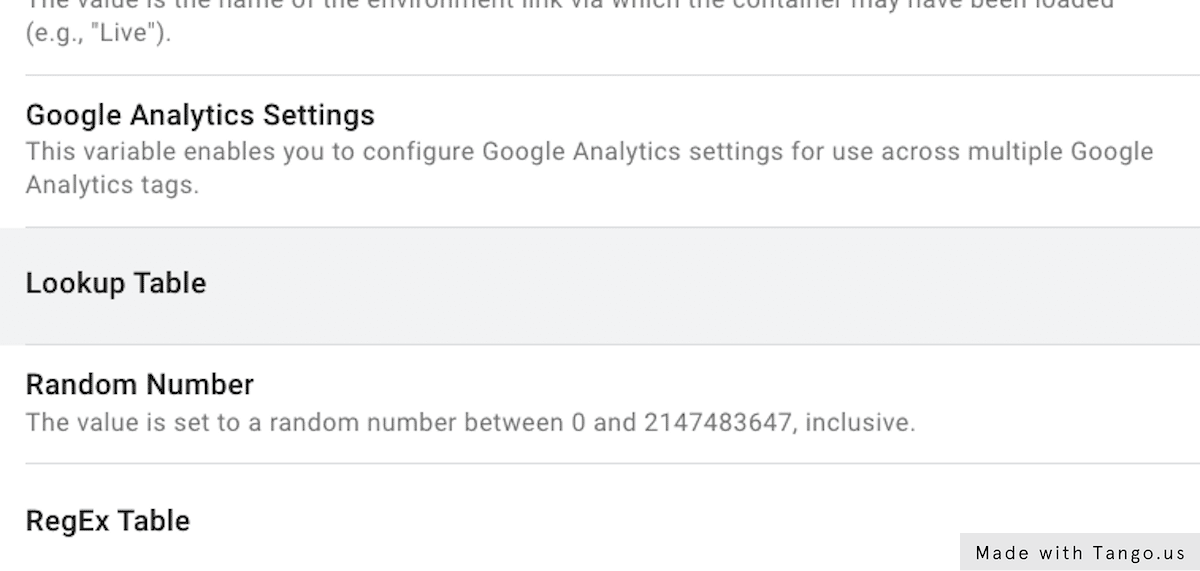
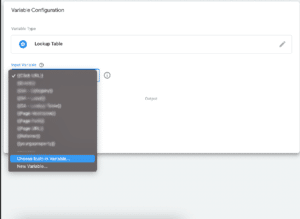
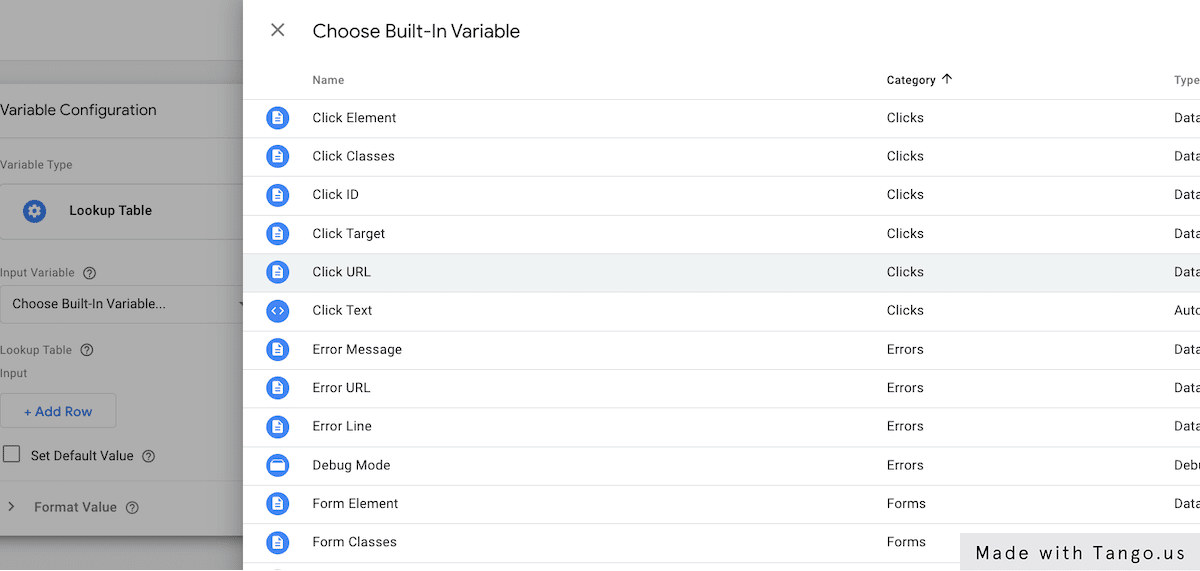
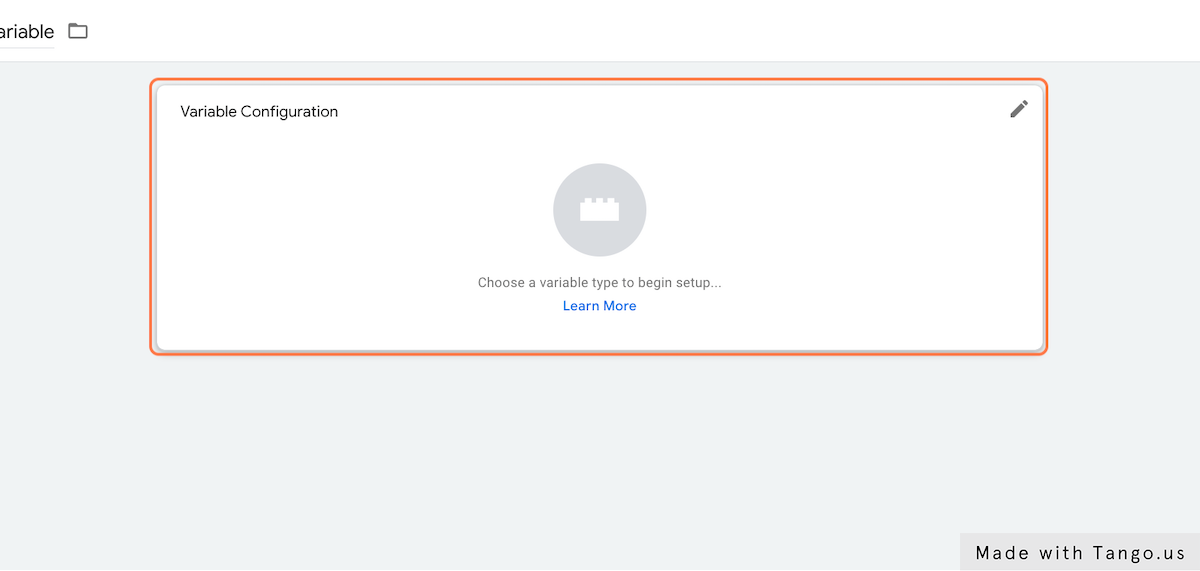
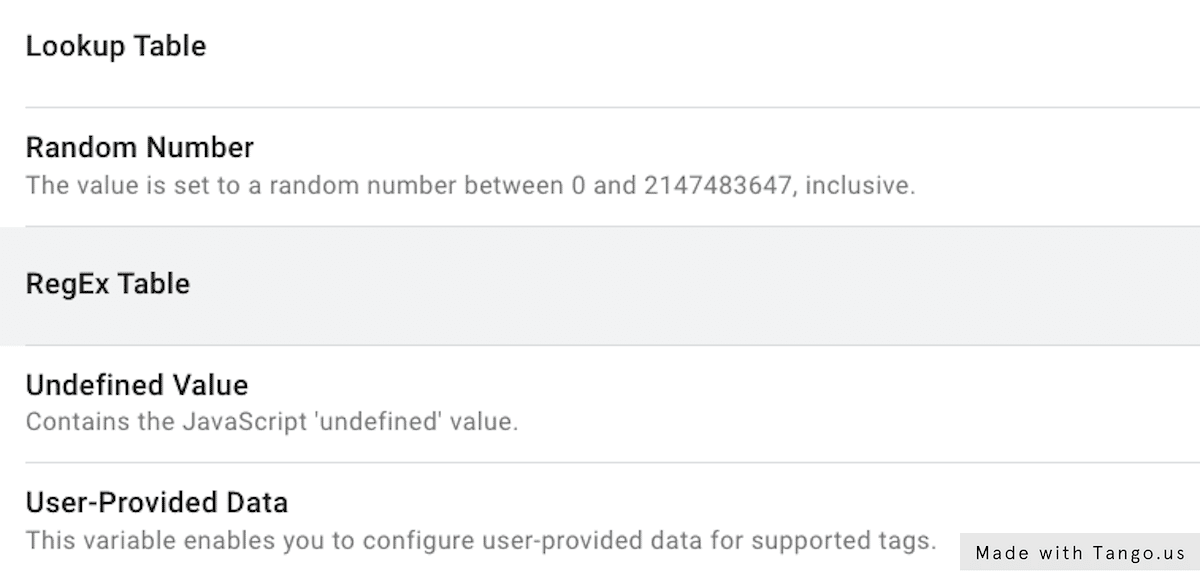
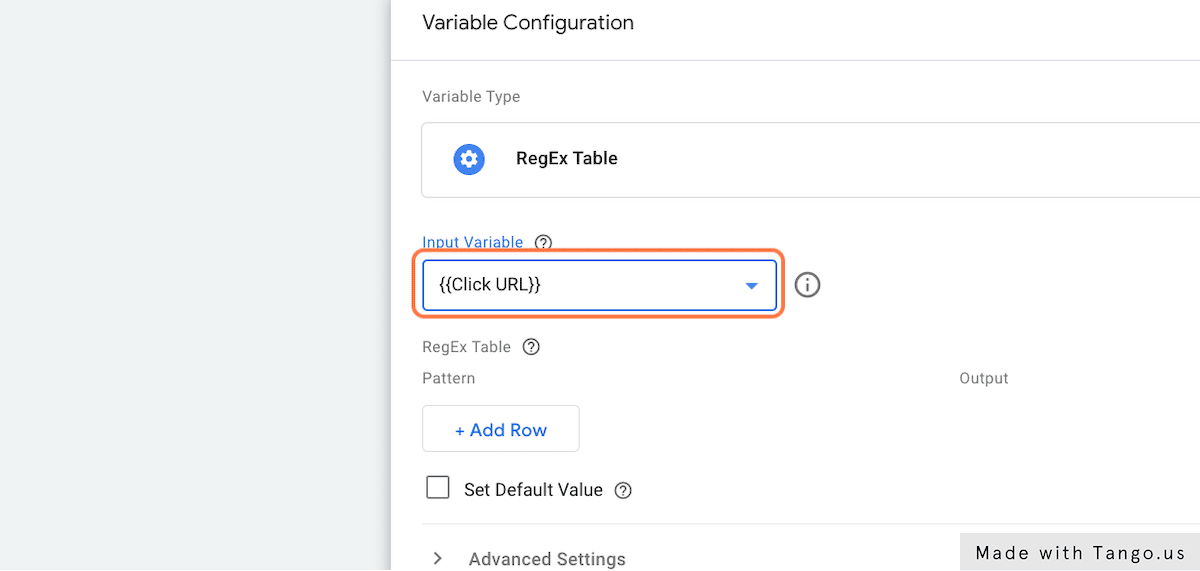
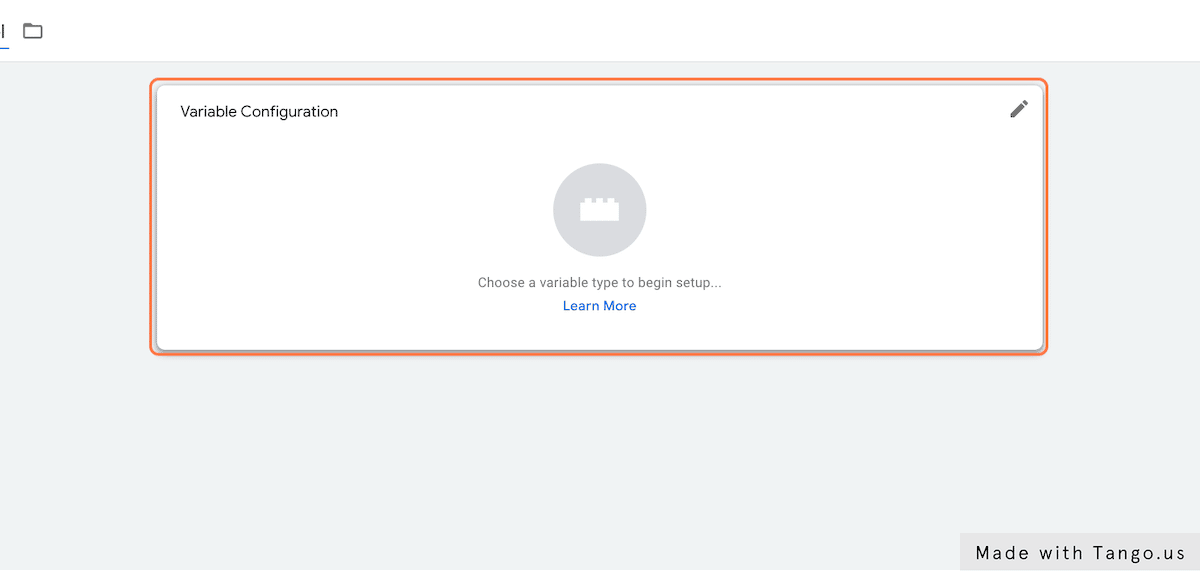
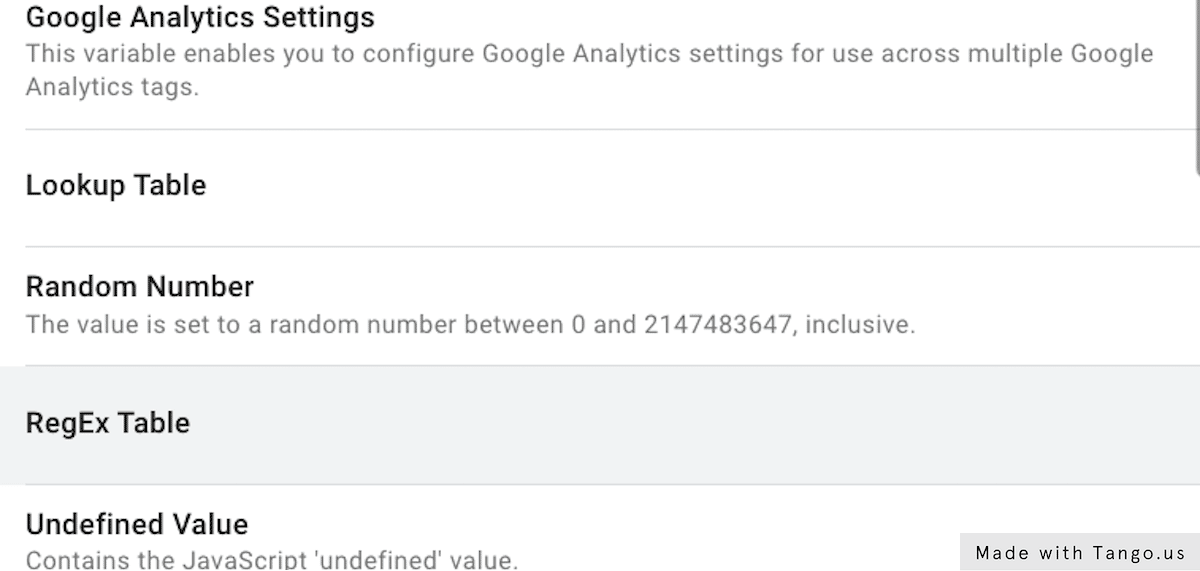
    • Then create a variable from custom Javascript that will return value from AF_SMART_SCRIPT_RESULT.

Created a variable from custom javascript that will return value from AF_SMART_SCRIPT_RESULT.

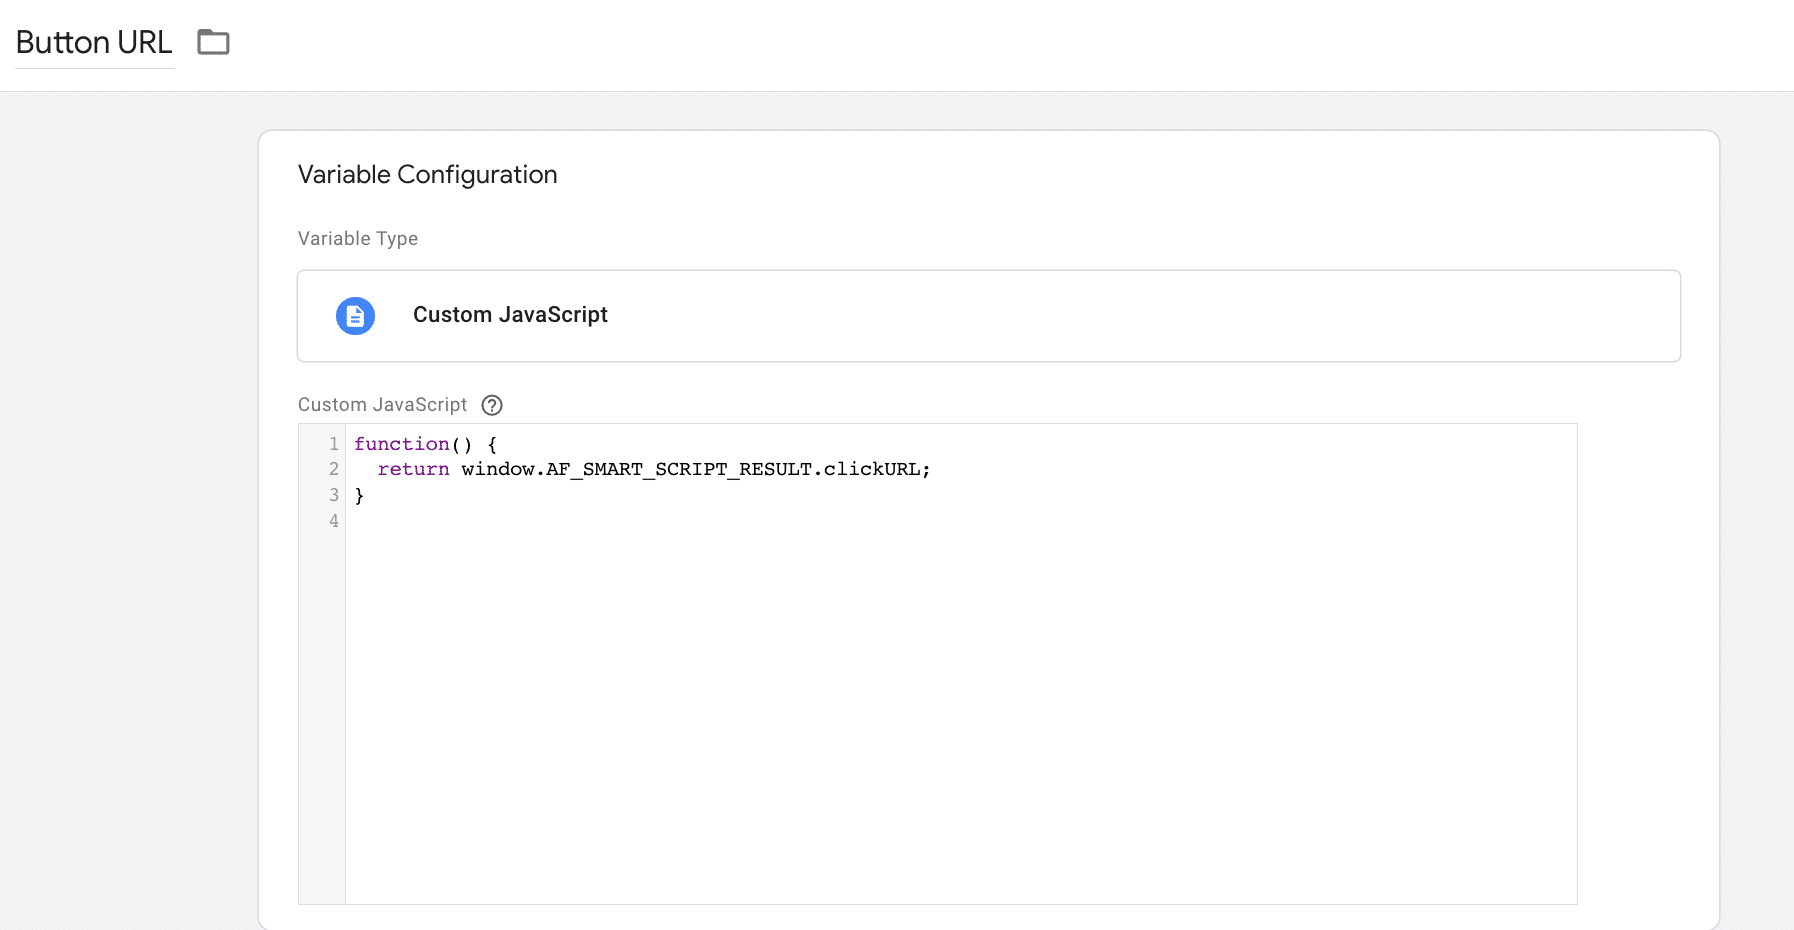
    • Or you can copy directly from this:
  •  
				
					function() {
return window.AF_SMART_SCRIPT_RESULT.clickURL;
}


2. Add the condition that the script must only work for mobile devices to make sure that it’s not working on desktop

    • So here is the outcome which you can copy and paste into your Google Tag Manager.
				
					<script>
if ( /Android|webOS|iPhone|iPad|iPod|BlackBerry|IEMobile|Opera Mini/i.test(navigator.userAgent) ) {
var links = document.querySelectorAll('[href*="sem.onelink"]');
for (var i = 0; i < links.length; i++) {
      links[i].addEventListener("click", function(){
    this.href = {{Button URL}};
      });
    }
  }
</script>


After that, I can just create a Custom HTML Tag using Dom Ready or Page View as a trigger and paste the code down as in the screenshot.

Then you are good to go!

Now, we’d love to hear from you if you find this article interesting. In case you are interested in our services and would like us to provide help in related topics, please feel free to contact us via email at analytics@maketyze.

Ultimate Guide to automate your TikTok Ads report

By Analytics2 Comments

There are many tools out there that allow you to pull data easily from your TikTok Ads accounts into a Google Spreadsheet for further processing. However, they usually come at a monthly cost. Therefore, we would like to share a solution to automate the data pulling from TikTok Ads for free by using our template!

In this article, we will also share what you need to use our template, things to look out for, and what the report will look like.

Prerequisites before starting pulling TikTok Ads data

To use TikTok API to pull data for your TikTok Ads, you will first need to register as a developer here and create an app.

For the expected outcome, please refer here to see support dimensions and metrics.

(Keep in mind that there can only be one ID dimension and one-time dimension in each request. For example, you can only have campaign_id with stat_time_day but not with the adgroup_id or ad_id ID dimensions)

Wait until your TikTok app is approved

After the app is approved, you will see your app id and secret.

TikTok App ID and secret key page The next thing you should get from the app is an authorization code (auth code).
Here is how you can get the auth code:

  1. First, go to https://ads.tiktok.com/marketing_api/apps/
  2. Choose your TikTok app.

    TikTok for business developers API page
  3. Now you will see app information including app id and secret.
  4. Then you will need to copy the URL from Advertiser authorization URL.

    TikTok for Business Development Marketyze Business Manager

  5. You will need to open the copied URL in a new browser’s tab. It will redirect you to the permissions page and you will need to go through a verification process.
  6. Once you’ve verified, you will again be redirected to whatever you had entered as the app’s Advertiser Redirect URL

    Here you will be able to see your auth code in the URL. See our Marketyze example below!

    Marketyze Auth code from URL bar

Please keep in mind that the auth code is for one-time use only. If you need to generate a new auth code, you will need to generate a new token as well.

Now you’re ready to get your TikTok Ads data!

STAGE 1: Generate your TikTok Ads access token!

  1. Make a copy of this Google Sheet

    Make a copy of the Google Sheets to extract the TikTok Ads data template created by Marketyze.
  2. In the tab name “(1) Generate Token”, fill in your TikTok app id, auth code, and app secret.

    Insert the necessary information into the Google Sheets to extract TikTok Ads data created by Marketyze.
  3. Then click on the “Generate Token” button

    Click on generate token on the Google Sheets to extract TikTok Ads data created by Marketyze.

  4. Once it’s done, you will see the TikTok access token with run status and time

Access token and run time updated on the Google Sheets to extract TikTok Ads data created by Marketyze.

STAGE 2: Get your TikTok Ads report!

  1. In the tab name “(2) Configure”, fill in your TikTok Ads report name, ad account id, data level, dimensions, metrics, and date range.

    Configure the Google Sheets to extract TikTok Ads data created by Marketyze.
  2. Click on the “Run Report” button. This might take a long while, perhaps around 3-5 minutes

    Click on Run Report on the Google Sheets to extract TikTok Ads data created by Marketyze.

  3. Once done, you will see the run status and the new tab created with a Tiktok_ ‘Your report Name’.

    Your report is ready! Below is an example of a TikTok Ads report generated.

Sample report generated by the Google Sheets to extract TikTok Ads data created by Marketyze.

If you want to run the report again, go back to the sheet and click the “Run report” button in the sheet “(2) Configure.” There is no need to recreate the token. Please keep in mind, however, that re-running the report will override — and not merge — the previous data pulled from your TikTok Ads.

We’d love to hear from you if, and how you are using this template. If you need any help, please feel free to contact us via email: analytics@marketyze.io

Google Tag Manager for link tracking

How to track link clicks on your website using Google Tag Manager

By Analytics6 Comments

Sometimes there might be a lot of similar links on your websites that you’d like to track as a “Click” event and see reported in Google Analytics. These can be clicks on your Social Media buttons (e.g. Facebook, Instagram, TikTok, etc), on your contact forms or any group of similar links. However, if you have a lot of buttons under one category, it will get tedious to create tags individually for each event. We’d like to show you how to save time by using Google Tag Manager’s (GTM) Lookup Table and RegEx Table variables.

Pre-requisite before starting

All you need to do is ensure that Google Tag Manager is properly installed on your websites! Then we’ll begin by creating variables, triggers, and tags. You can follow the steps outlined below.

Create variables – Google Tag Manager Lookup Table

A Google Tag Manager Lookup Table is a variable that will allow you to pair values from one variable with your desired value. So we can decide which link clicks to track and which value to return here.

1. Click on Variables

Click on Variables

2. Click on New

Click on New

3. Click on Variable Configuration

Click on Variable Configuration…

4. Click on Lookup Table

Click on Lookup Table

5. Select Choose Built-In Variable from Input Variable

6. Click on Click URL

This built-in variable, Click URL, will display the URL of the page where the button was clicked. This is where we indicate which link click to create as an event.

Click on Click URL

7. Click on + Add Row

Click on + Add Row

8. Type the URL of any link clicks you’d like to track into Input

Type your URL of any link clicks you'd like to track into input

9. Type “Social Click – Facebook” into Output

Here, I like to set my naming convention by categorizing and destination, and the separator will be a dash symbol (-). For example, I name click to my Facebook page as “Social Click – Facebook.” The category is “Social Click” and the destination is “Facebook”

Type

10. Click on + Add Row

If you have several link clicks to other websites, you can fill in more by clicking Add Row

Click on + Add Row

11. Name your variables and click “Save” – Here I name it “GA – Lookup Table”

Name your variables and click “Save” - Here I name it as “GA - Lookup Table”

Create variables – RegEx Table

In Google Tag Manager, a RegEx Table is used to determine whether or not an input pattern matches and, if so, to return the corresponding output value.

1. Click on New

Click on New

2. Click on Variable Configuration

Click on Variable Configuration…

3. Click on RegEx Table

Click on RegEx Table

4. Click on {{Click URL}} from Input Variable

Click on {{Click URL}} from Input Variable

5. Click on + Add Row

Click on + Add Row

6. Paste “(.*?) – (.*)” into input

This is a regular expression that contains 2 capturing groups which are (1) 1st capturing group (.*?) means to match any character until the next delimiter and (2) 2nd capturing group (.*) means to match any character until the end of string, this will ignore the next delimiter. For a dash (-) matches the character (-) literally.

Paste

7. Type “$1”

If you remember from creating Lookup Table, we have defined the naming convention with a dash (-) separator. $1 here is equivalent to the text before the separator so this variable will return any value before the dash

Type

8. Name the variable – Here I name it “GA – Category”

Name the variable

9. Click on Save

Click on Save

10. Again, click on New to create RegEx Table for the label

Click on New

11. Click on Variable Configuration

Click on Variable Configuration…

12. Click on RegEx Table

Click on RegEx Table

13. Click on {{Click URL}} from Input Variable

Click on {{Click URL}} from Input Variable

14. Click on + Add Row

Click on + Add Row

15. Paste “(.*?) – (.*)” into input

Paste

16. Type “$2”

$2 here is equivalent to the text after the separator so this variable will return any value after the dash

Type

17. Name the variable – Here I name it “GA – Label”

Name the variable

18. Click on Save

Click on Save

Create Triggers

1. Click on Triggers

Click on Triggers

2. Click on New

Click on New

3. Click on Trigger Configuration

Click on Trigger Configuration…

4. Click on Just Links

Click on Just Links

5. Click on This trigger fires on Some Link Clicks

Click on This trigger fires on Some Link Clicks

6. Select GA – Lookup Table

Select GA - Lookup Table

7. Type “undefined” – The operator here should be “does not equal”

This means that any link clicks happen, their {{Click URL}} are in the Lookup Table will be fired

Type

8. Name the Trigger – Here I name it as Trigger – Link Click

Name the Trigger

9. Click on Save

Click on Save

Create Tags

1. You need to create a tag to send a link click event to Google Analytics by selecting as following:

    1. Tag Type: Google Analytics: Universal Analytics
    2. Track Type: Event
    3. Category: Select from variable {{GA – Category}}
    4. Action: Click (you can define whatever you’d like here)
    5. Label: Select from variable {{GA – Label}}

2. This tag needs to be fired on “Trigger – Link Click” so choose this as a trigger of this tag

3. Name your tag and click “Save” – Here I name it “GA – Link Click

Once you have done your set-up, you will be able to see your event on Google Analytics under the event report!

Bonus – Another shortcut

Free templates that you can use with just a few changes required from you!

thThai

Our website uses cookies and other tracking technologies to improve your browsing experience as set in our Privacy policy.

ตั้งค่าความเป็นส่วนตัว

You can turn your cookie settings on and off. Cookies of each type are available on request, except for necessary cookies.

ยอมรับทั้งหมด
จัดการความเป็นส่วนตัว
  • Necessary cookies
    เปิดใช้งานตลอด

    These cookies are strictly necessary for the operation of our website. You cannot disable these cookies.

บันทึกการตั้งค่า